Why Camera Choice Matters for Gorilla Trekking
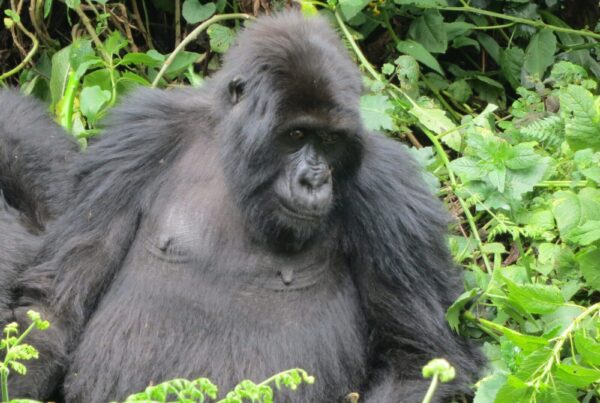
The hour you spend with mountain gorillas passes in what feels like minutes. During that precious time, you’ll want to capture images that do justice to the encounter: the intelligence in a silverback’s eyes, the tenderness of a mother cradling her infant, the playful energy of juveniles tumbling through the undergrowth. Your camera choice significantly impacts whether those memories translate into photographs you’ll treasure for decades.
But gorilla trekking presents unique photographic challenges. The forest understory is dim, flash photography is strictly prohibited, rain is always possible, and you’re maintaining a minimum 7-metre distance from wild animals. This guide helps you choose the right camera equipment for your gorilla trek, from smartphone shooters to professional photographers seeking publication-quality images.
Understanding the Photography Constraints
No Flash Photography
The most critical rule: flash photography is absolutely prohibited. The sudden burst of light can startle gorillas, trigger defensive behaviour from silverbacks, and cause distress. Your camera must perform well in low natural light. This single constraint eliminates many casual camera options and demands equipment with excellent high-ISO performance.
Low Light Conditions
Bwindi’s dense canopy filters sunlight dramatically. Morning treks (when most gorilla encounters occur) are particularly dim. Effective photography requires:
- Fast lenses (wide apertures like f/2.8 or wider)
- Good high-ISO performance (ISO 1600-6400 without excessive noise)
- Image stabilisation to allow slower shutter speeds
Variable Weather
The forest is humid, and rain can occur any time. Your camera needs weather protection or you need rain covers. Condensation when moving between air-conditioned lodges and humid forest is another consideration.
Physical Constraints
You’re hiking through dense vegetation, sometimes for hours. Heavy equipment becomes burdensome. You’ll also need one hand free for balance and moving vegetation. Bulky camera bags are impractical.
Camera Options Ranked by Capability
1. Smartphone Photography
Best for: Casual trekkers who want social media memories without carrying extra equipment
Modern smartphones can produce surprisingly good gorilla trekking photos:
- Advantages: Always in your pocket, instant sharing, good low-light performance in recent models, wide and telephoto lenses
- Limitations: Digital zoom degrades quality, small sensors struggle in very low light, limited manual control, battery drains quickly in cold/humid conditions
Tips for smartphone success:
- Use the telephoto lens (not digital zoom) for closer shots
- Enable HDR for challenging light conditions
- Shoot in RAW if your phone supports it
- Bring a portable power bank
- Clean your lens frequently; humidity causes condensation
Recommended phones: iPhone 14 Pro/15 Pro, Samsung Galaxy S23 Ultra, Google Pixel 8 Pro
2. Compact Camera (Point-and-Shoot)
Best for: Travellers wanting better quality than smartphones without the complexity of interchangeable lenses
High-end compact cameras offer excellent image quality in pocketable packages:
- Advantages: Large sensors (1-inch or larger), fast lenses (f/1.8-2.8), optical zoom, manual controls, better ergonomics than phones
- Limitations: Fixed lens limits flexibility, smaller sensors than mirrorless/DSLR, limited weather sealing in most models
Recommended models:
- Sony RX100 VII (24-200mm equivalent, excellent autofocus)
- Canon PowerShot G7 X Mark III (great low light, flip screen)
- Panasonic Lumix LX100 II (Micro Four Thirds sensor, fast lens)
3. Mirrorless Camera
Best for: Enthusiast photographers wanting professional-quality images in a lighter package than DSLR
Mirrorless cameras have revolutionised wildlife photography with their compact size and exceptional performance:
- Advantages: Large sensors (APS-C or full-frame), interchangeable lenses, excellent autofocus systems, electronic viewfinders, 4K video capability, lighter than DSLRs
- Limitations: More expensive than compacts, requires lens knowledge, battery life shorter than DSLRs
Recommended setups:
- Sony A7 IV with 24-105mm f/4 or 70-200mm f/2.8
- Canon EOS R6 with RF 24-70mm f/2.8 or RF 100-400mm
- Nikon Z6 II with 24-70mm f/2.8 or 70-200mm f/2.8
- Fujifilm X-T5 with XF 50-140mm f/2.8 (APS-C, lighter option)
4. DSLR Camera
Best for: Professional photographers or serious enthusiasts with existing DSLR systems
DSLRs remain capable tools for gorilla photography:
- Advantages: Excellent battery life, proven durability, vast lens selection, optical viewfinders, mature ecosystems
- Limitations: Heavier than mirrorless, manufacturers shifting focus to mirrorless, bulkier for trekking
Recommended bodies:
- Canon EOS 5D Mark IV or EOS 90D
- Nikon D850 or D780
Essential Lenses for Gorilla Photography
Recommended Focal Lengths
At 7 metres minimum distance, these focal lengths work well:
- 24-70mm f/2.8: Versatile for environmental shots and family groups
- 70-200mm f/2.8: Ideal for portraits and detailed shots without getting too close
- 100-400mm: Excellent for detailed portraits and when gorillas are further away
A 70-200mm f/2.8 is arguably the single best lens for gorilla trekking, offering reach, low-light capability, and manageable size.
Aperture Priority
Fast lenses (f/2.8 or wider) are essential. In dim forest conditions:
- f/2.8 allows ISO 3200 at 1/125s
- f/4 requires ISO 6400 for the same exposure
- f/5.6 pushes ISO to 12800, degrading image quality significantly
Practical Camera Settings
Recommended Settings
- Mode: Aperture Priority (A/Av) or Manual
- Aperture: Widest available (f/2.8 or wider)
- ISO: Auto, capped at 6400-12800 depending on camera capability
- Shutter speed: Minimum 1/125s for still gorillas, 1/250s for movement
- Focus: Continuous autofocus (AF-C), single point or zone
- Drive mode: Continuous shooting for capturing action sequences
- White balance: Auto or shade preset for forest lighting
- Image quality: RAW + JPEG for maximum editing flexibility
Before the Trek
- Charge all batteries fully
- Format memory cards
- Disable flash (set physically or in menu)
- Test all settings
- Pack lens cleaning supplies
- Bring spare batteries and memory cards
Accessories That Make a Difference
Essential Accessories
- Spare batteries: Cold and humidity drain batteries faster than expected
- Memory cards: Multiple high-capacity cards; don’t rely on a single card
- Lens cleaning kit: Microfiber cloth, blower brush, lens solution
- Rain cover: Dedicated camera rain cover or large ziplock bags as backup
- Camera strap: Comfortable neck or sling strap for hands-free hiking
Useful Additions
- Monopod: More practical than tripods in dense forest
- Bean bag: Useful if shooting from seated positions
- Silica gel packets: Keep moisture out of camera bag
- Headlamp: For adjusting settings in dim conditions
What NOT to Bring
- Flash units: Prohibited and unnecessary
- Tripods: Impractical on narrow, uneven forest trails
- Large camera backpacks: Burdensome during trekking
- Drones: Strictly prohibited in national parks
- Multiple camera bodies: Excessive weight; one capable body suffices
Balancing Photography With Experience
The One-Hour Dilemma
With only one hour with gorillas, every minute counts. Experienced wildlife photographers recommend:
- Spend the first 10-15 minutes observing without shooting
- Identify the best angles and subjects
- Shoot in bursts rather than continuously
- Put the camera down periodically to simply observe
- Focus on behaviour and interaction, not just portraits
Remember: the best memory is the one you experience directly, not just through a viewfinder.
Post-Trek Care for Your Equipment
- Remove batteries and memory cards immediately
- Wipe down all equipment with a dry cloth
- Let equipment air dry before storing
- Clean lenses thoroughly; forest moisture leaves residue
- Charge batteries for the next day
- Back up images to multiple locations
Budget Recommendations
| Budget Level | Recommended Setup | Estimated Cost |
|---|---|---|
| Minimal | Smartphone + power bank | $0-50 |
| Moderate | Compact camera (Sony RX100) | $800-1,200 |
| Enthusiast | Mirrorless + 70-200mm f/2.8 | $3,000-5,000 |
| Professional | Full-frame + multiple lenses | $5,000-10,000+ |
Conclusion
The best camera for gorilla trekking is the one you know how to use well. A skilled photographer with a smartphone captures better images than a novice with professional equipment. Whatever you choose, master your camera before arriving in Uganda, disable the flash, bring spare batteries, and remember that some moments are best experienced through your own eyes rather than a lens.
When that silverback makes eye contact through the mist, whether you capture it with a phone or a flagship mirrorless camera, you’ll have a memory that transcends pixels. The gorillas don’t care about your equipment; they care about your respectful presence. Bring the camera that lets you capture that presence without intruding on theirs.
- Best camera for gorilla trekking 2027: mirrorless vs DSLR vs phone
- iPhone gorilla photography: getting the best from a smartphone
- Best camera bag for gorilla trekking: protecting gear on steep forest trails
- Best camera bags for safari: how to protect your gear on the gorilla trek
- Mirrorless vs DSLR for gorilla trekking: which camera system to bring
- Mirrorless versus DSLR for gorilla trekking: which camera system wins in the forest
- Best Time for Gorilla Trekking in Uganda – Monthly Guide to 2025 Seasons
- The Best Time to Climb or Hike Mount Rwenzori
- Birds of Uganda: The Untamed Symphony of Africa’s Best Birding Paradise
- Cultural Tourism Sites in Uganda – Best Uganda Heritage