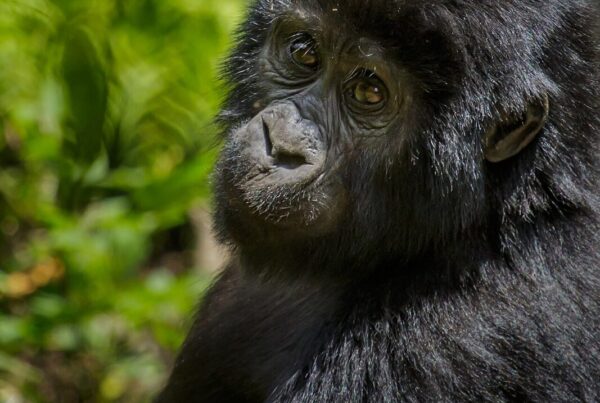
Photographing mountain gorillas in Bwindi Impenetrable Forest requires more specific technical preparation than almost any other wildlife photography subject — dense forest shade, a prohibited flash, a one-hour time limit, and the physical demands of a steep jungle hike all combine to create conditions where the difference between memorable images and blurred disappointments comes down to settings you make before you enter the forest, not during the encounter. These ten photography tips cover both the technical preparation and the mindset required to make the most of your hour with a mountain gorilla family — whether you are carrying a mirrorless camera, a DSLR, or a smartphone. For the sector decision that affects how much light and movement freedom you have, see the Bwindi sector comparison.
Key Highlights
- Set ISO to 1600–3200 before entering the forest — not during the encounter
- No flash under any circumstances — disable it at the morning briefing
- Best lens: 70–200mm f/2.8 for reach + light; 24–70mm for environmental portraits
- Gorilla Habituation Experience (USD $1,800) gives 4 hours vs 1 hour for standard permits
- Best sector for photography: Buhoma (more open canopy, easier terrain, steadier shooting)
- A habituated family‘s behaviour and rank are knowable before you trek — your guide can brief you
Photographing mountain gorillas in Bwindi Impenetrable Forest is one of the most technically challenging and emotionally rewarding wildlife photography experiences in the world. The challenges are specific and uncompromising: dense forest canopy reducing available light to levels that defeat standard camera settings, prohibited flash photography, the physical demands of reaching the gorillas through steep and muddy terrain, the strict one-hour time limit that creates intense pressure to get the shot, and the extraordinary power of the moment itself — which can cause even experienced photographers to freeze or forget everything they know about their equipment. These top photography tips address both the technical preparation and the mindset preparation required to capture images that do justice to one of the most remarkable wildlife encounters on earth.
1. Set Your Camera to ISO 1600–3200 Before You Enter the Forest
- Bwindi’s forest canopy reduces available light to deep shade conditions at forest floor level
- ISO 1600 to 3200 is the standard working range for forest floor gorilla photography
- Pre-set this on the walk in; do not wait until you are standing with the gorillas to adjust
- Use aperture priority mode with the widest aperture your lens allows for maximum light
- Enable Auto ISO with a minimum shutter speed of 1/200s to handle unpredictable gorilla movement
The single most important technical preparation for gorilla photography is understanding the light conditions you will work in. Bwindi Impenetrable Forest lives up to its name: the multilayered canopy — emergent trees, sub-canopy, shrub layer, and ground vegetation — reduces available light at the forest floor to deep shade levels even at midday. If you walk into the gorilla encounter with your camera set to the daylight or auto settings appropriate for open savannah photography, you will find your shutter speed dropping below 1/60 of a second in the gorilla zone — too slow to freeze a moving 200-kilogram silverback’s head turn, and producing motion blur in the vast majority of your shots. Setting your ISO to between 1600 and 3200 before you enter the forest, while you still have time to think calmly during the walking approach, gives your camera the sensor sensitivity it needs to maintain workable shutter speeds in the challenging low forest light of the gorilla zone.
The recommended camera mode combination for gorilla photography in Bwindi is aperture priority with your widest available aperture to maximise light intake, combined with Auto ISO set to a maximum of ISO 6400 and a minimum shutter speed of 1/200 seconds. This combination lets the camera handle ISO adjustment automatically as light conditions change within the forest — and they change constantly as you move between areas of denser and lighter canopy — while keeping your shutter speed high enough to freeze gorilla movement. Modern mirrorless and DSLR sensors from any major manufacturer produce acceptable image quality at ISO 3200 with good noise reduction in post-processing, and a slightly noisy in-focus gorilla portrait is infinitely preferable to a clean but motion-blurred image. Make these settings your starting point before entering the forest and adjust as the encounter develops.
Pre-set on the trail in: Use the walk from the forest edge to the gorilla group to dial in your exposure settings. By the time you arrive, your camera should be ready for the forest light with no menu navigation needed — leaving you free to focus entirely on composition and moment during the precious one-hour encounter window.
2. Choose a Versatile Zoom Lens Over a Fixed Prime
- A 70-200mm f/2.8 is the ideal single gorilla photography lens for those who own one
- A 24-105mm f/4 zoom provides versatile coverage when encounter distance is unpredictable
- Ultra-wide lenses are useful for close silverback encounters but impractical to predict in advance
- Avoid teleconverters; they reduce maximum aperture and worsen already-challenging low-light performance
- Keep your chosen lens mounted and ready before reaching the gorillas — not in a bag
Lens selection for gorilla trekking photography requires balancing two competing realities: gorillas are sometimes found at distances of 3 to 4 metres requiring standard focal lengths, and sometimes at 10 to 20 metres in thick vegetation requiring telephoto reach to fill the frame. The one-hour time limit and constant movement of the group means you cannot predict which scenario you will encounter, and cannot safely swap lenses in the dense wet forest without risking dust on your sensor or dropping equipment on difficult terrain. The 70-200mm f/2.8 zoom is the preferred gorilla photography lens for professionals and enthusiasts who own one — its combination of reach, image stabilisation, and the critical f/2.8 maximum aperture allowing usable shutter speeds at moderate ISO values in low forest light makes it the single most effective tool for this specific challenging environment.
However, the 70-200mm f/2.8 excludes wide-angle environmental shots of gorillas in their forest context, which are often the most compelling compositional choices when a very close encounter occurs. The practical compromise for visitors without this lens is a high-quality 24-105mm f/4 or similar versatile standard zoom, accepting slightly more image noise in exchange for compositional flexibility across the full range of encounter distances the forest unpredictably delivers. Whichever lens you bring, have it mounted and set before you reach the gorilla family — not stored in your pack. The moment the ranger signals that the gorillas are directly ahead, every second spent on equipment preparation is a second lost from the encounter itself.
70-200mm f/2.8 if you have one: If you own a 70-200mm f/2.8, it is the best gorilla photography lens available and worth carrying despite its weight. If not, a 24-105mm f/4 provides excellent compositional versatility — manage the light loss by accepting ISO 3200 to 6400 and investing time in noise reduction during post-processing after the trek.
3. Flash Is Absolutely Prohibited — Understand Why and Shoot Better Without It
- Flash photography is completely prohibited with mountain gorillas in all gorilla parks without exception
- Flash causes genuine stress to gorillas and can trigger aggressive defensive responses
- This rule is actively enforced; violation risks immediate expulsion and permit cancellation
- Available forest light — when read correctly — produces more beautiful gorilla portraits than flash
- Look for light shafts through the canopy and position yourself relative to natural light direction
The prohibition on flash photography with mountain gorillas is absolute, enforced, and entirely correct from a wildlife welfare perspective. Mountain gorillas, despite their habituation to human presence, experience flash as a startling and stressful stimulus — a sudden burst of intense artificial light in a forest environment where light changes slowly and naturally. Stressed gorillas respond with defensive behaviours including chest beating, charging displays, and withdrawal deeper into vegetation, all of which terminate the photography encounter and create a negative experience for the animals whose welfare is the first priority of every ranger present. This is not a guideline that can be selectively applied based on how close or calm a particular gorilla appears — it is a blanket prohibition that Uganda Wildlife Authority rangers enforce strictly, and violations result in immediate expulsion from the encounter with potential permit cancellation.
The creative paradox of the no-flash rule is that it actually pushes gorilla photography toward more beautiful and authentic results than flash would produce. Available forest light in Bwindi — particularly on partly cloudy mornings when soft diffused light penetrates the canopy evenly — provides gentle and dimensionally interesting illumination that brings out the extraordinary texture of gorilla fur, the expressiveness of facial features, and the relationship between the animals and their forest environment in a way that the harsh flat burst of a flash never could. Learning to read the available light during the gorilla encounter — identifying where light patches fall, positioning yourself so the natural light direction illuminates the gorilla’s face rather than backlighting it, and being patient while the animal moves through shifting conditions — is the real skill in gorilla photography, and developing this skill produces work that flash-dependent photography cannot match.
Disable flash completely before the forest: At the briefing point, turn off your camera’s built-in flash, disable any external flash unit, and confirm your camera is not set to auto-flash mode. Do this check before entering the forest while you have calm attention to spare — not in the moment of gorilla excitement when important details are easily overlooked.
4. Use Image Stabilisation and Understand Its Limits
- Enable in-body or in-lens image stabilisation on all lenses that offer it before entering the forest
- Stabilisation compensates for camera shake but not for gorilla subject movement
- Minimum 1/200s shutter speed still required even with the best stabilisation systems
- A lightweight monopod adds stability without the impracticality of a tripod on forest terrain
- Tripods are impractical in dense Bwindi terrain; monopods are the correct tool here
Image stabilisation — whether in-body in modern mirrorless cameras or in-lens in stabilised zoom lenses — is a critical capability for gorilla photography in Bwindi’s low-light forest environment. Stabilisation compensates for the micro-movements of your hands and body that cause camera shake at slow shutter speeds, allowing you to handhold a camera at shutter speeds 2 to 4 stops slower than would otherwise produce sharp images. In practice, this means a stabilised camera-lens combination can handhold at 1/50 to 1/100 of a second and produce sharp images where an unstabilised combination would require 1/200 to 1/400. This difference translates to lower ISO settings for equivalent image quality and less digital noise in your final photographs. Ensure your image stabilisation is enabled before entering the forest — the switch or menu setting is easy to overlook under the emotional intensity of the impending encounter.
The important caveat is that image stabilisation eliminates blur caused by camera movement but not blur caused by subject movement. A gorilla turning its head, a juvenile running between adults, or an infant swinging in the vegetation will introduce subject motion blur regardless of how perfectly stable your camera is held. This is why the minimum shutter speed guidance of 1/200 seconds remains essential even with the best stabilisation systems — at slower speeds, gorilla movement during the exposure registers as blur on the subject regardless of camera stability. A lightweight carbon fibre monopod is the most practical physical stabilisation tool for the gorilla trek: light enough to carry on the walk, quick to deploy when you reach the gorillas, and effective in the tight spaces of a forest trail where a full tripod is impractical.
Consider a monopod: A lightweight carbon fibre monopod adds under 400 grams to your pack, provides meaningful stability during the gorilla encounter particularly with heavier telephoto zooms, and doubles as a walking aid on the steep muddy trek terrain. It is one of the most practical dual-purpose accessories for a Bwindi gorilla photography day.
5. Protect Your Camera From Rain, Mud, and Forest Humidity
- Bwindi is a rainforest; unexpected rain during gorilla treks is common even in dry season months
- Pack a rain cover or waterproof sleeve for your camera and lens combination
- High forest humidity can cause lens fogging when moving from cool open areas into warm forest interior
- Silica gel sachets in your camera bag absorb excess moisture and reduce condensation risk
- Protect camera from mud during falls on steep terrain; keep it on your body or in a padded sling
Bwindi Impenetrable Forest is a high-altitude equatorial rainforest and lives up to the description reliably: rain can arrive suddenly at any time of year, even during the dry season months of June to September and December to February when precipitation is reduced but never absent. Many gorilla treks encounter brief rain showers, and some encounter hours of sustained rain during which you remain in the forest and continue photographing. Camera equipment not protected from rain during an unexpected downpour can be seriously damaged by water ingress through lens barrel seams, camera body controls, and the lens-body mount. A lightweight neoprene rain cover fitted over the camera and lens combination takes less than a minute to deploy and costs a small fraction of the repair or replacement cost for water-damaged equipment. Pack one and keep it accessible at the top of your camera bag alongside your camera, not buried at the bottom.
Beyond rain, Bwindi’s high humidity creates a less obvious but equally real equipment risk: condensation on lens elements when the glass is cooler than the surrounding forest air. This most commonly occurs when you move from a cooler open environment into the warmer, wetter forest interior — the lens surface temperature drops below the dew point and a layer of condensation forms on the front element, producing visibly foggy images that cannot be corrected in post-processing. The solution is allowing the camera and lens to equilibrate to the forest temperature before beginning to photograph — holding the camera in ambient air without shooting for 10 to 15 minutes typically allows the glass to warm sufficiently. Silica gel desiccant sachets kept in your camera bag absorb excess humidity during transport and reduce condensation risk significantly; replace them every few days of forest photography to maintain their effectiveness.
Pack a rain cover as essential kit: A universal camera rain sleeve fits in a jacket pocket and can be the difference between a working camera and damaged equipment during a Bwindi downpour. Treat it as essential rather than optional — the forest does not announce its weather intentions in advance, and the cost of preparation is trivial compared with the cost of equipment failure during your one-hour gorilla encounter.
6. Slow Down, Compose, and Wait for the Right Moment
- The one-hour time limit creates shooting anxiety; resist the urge to fire continuously from arrival
- Watch the gorilla group behaviour for 2 to 3 minutes before pressing the shutter
- Direct eye contact between gorilla and lens is the most powerful compositional element in any portrait
- Include forest context — leaves, branches, habitat — in some frames alongside tight portrait close-ups
- A selective edit of 20 intentional images beats 400 anxious snapshots without a standout among them
The most common mistake among first-time gorilla photographers is the anxiety response to the one-hour time limit: frantic, continuous shooting from the moment of arrival that produces hundreds of similar frames without a single compositional standout. The experienced gorilla photographer does the opposite — arrives at the gorilla group, takes a breath, watches for two to three minutes without pressing the shutter, and builds an understanding of the dynamic — where the silverback is positioned, what the juveniles are doing, where the light is best, which animals are most active — before making deliberate compositional decisions. This initial observation period converts the subsequent shooting from anxious documentation to purposeful image-making, and the resulting edit is dramatically more selective and powerful than anything produced in a reactive burst-fire approach.
The single most powerful compositional element in gorilla photography is direct eye contact between the gorilla and the camera lens — a moment of mutual acknowledgement between human and great ape that carries extraordinary emotional weight in a finished image. Patience in positioning for this moment, and readiness with the shutter when it arrives, separates the memorable gorilla photograph from the competent but unremarkable one. Include environmental context — leaves, branches, the forest floor, the quality of light filtering through canopy — in some frames to tell the story of the encounter in its actual setting, rather than filling every frame edge to edge with fur and face. Both environmental portraits and tight behavioural detail shots belong in a strong gorilla photography edit, and the hour gives you time for both if it is spent with intention rather than the anxiety that the time limit can produce in an unprepared photographer.
Give your first minutes to observation: The first three minutes with the gorillas belong to your eyes and mind, not your camera. Stand still, watch, find the light, identify the eye contact opportunity, understand the family dynamic. When you begin shooting with intention rather than reaction, every frame will be stronger than anything produced in the anxious first burst of arrival excitement.
Gorilla photography in Bwindi rewards preparation, technical competence, and the rarest quality in wildlife photography: the ability to slow down under extraordinary pressure and make deliberate compositional choices. Master your camera settings before the forest, protect your equipment from the elements, shoot with intention during the one-hour window, and respect the absolute rules around flash and approach distance — and you will return with images that capture not just the appearance of mountain gorillas but something of the profound nature of the encounter itself.
Frequently Asked Questions
The standard starting settings for Bwindi gorilla photography are: ISO 1600–3200, aperture priority mode at your widest available aperture (f/2.8 or f/4), Auto ISO enabled with a maximum of ISO 6400, and a minimum shutter speed of 1/200s to freeze gorilla movement. Pre-set these on the walk in — not when you are standing with the gorillas. Aperture priority with Auto ISO lets the camera adjust as light conditions change between denser and lighter canopy sections while keeping your shutter speed high enough to capture sharp images of moving animals. Can I bring a professional camera and tripod on a gorilla trek in Uganda? Yes — professional cameras, DSLRs, mirrorless bodies, and large telephoto lenses are all permitted on all Bwindi and Mgahinga gorilla treks. Tripods are technically allowed but impractical in dense forest terrain — a monopod is a better choice as it provides image stabilisation on one axis without obstructing movement. The only absolute restrictions are: no flash photography of any kind (disable before entering the forest), and the standard rules about noise and movement that apply to all trekkers. Professional video cameras are also permitted. What is the best time of day to photograph gorillas in Bwindi? All gorilla treks begin at 7–8 a.m. — this is the fixed schedule, not a choice. Morning encounters have the advantage of finding gorilla families in their nesting areas before they begin the day’s wide-ranging movement, which often means they are more stationary and easier to photograph. The light quality inside Bwindi’s forest is similarly low at any time of day due to the dense canopy, so morning does not offer a significant exposure advantage over afternoon. The one-hour time limit applies from first gorilla contact regardless of when the family is found. Which Bwindi sector is best for gorilla photography? Buhoma is generally considered the most photography-friendly sector because the forest canopy is slightly more open than Rushaga or Nkuringo, the terrain is more manageable (leaving more physical attention available for shooting), and some families are encountered in more open clearings. Rushaga’s Gorilla Habituation Experience (4 hours, USD $1,800) is the single best photography permit in either country — four times the time with the gorillas compared to a standard one-hour trek. For serious photographers, combining a standard Buhoma trek with a Rushaga GHEX on consecutive days is the optimal Bwindi photography itinerary. Will a smartphone camera produce good gorilla photos? Modern flagship smartphones (iPhone 15 Pro, Samsung Galaxy S24 Ultra, Google Pixel 9 Pro) can produce strong gorilla images in good conditions — when the gorilla is within 5–8 metres, relatively stationary, and you are in a patch of open canopy light. Their limitations show in the same conditions that challenge dedicated cameras: very low light, fast movement, and distances beyond 10 metres where optical zoom runs out. For most visitors whose goal is quality memories and social media sharing, a flagship smartphone is sufficient. For visitors whose primary goal is printable, publishable, or exhibition-quality images, a mirrorless or DSLR body with a fast telephoto lens is the better tool. Plan your gorilla photography safari Uganda Gorilla Permit Guide — booking process, sectors, GHEX details Bwindi Sector Comparison — choose the sector with the right terrain and light for photography All Uganda Gorilla Families — brief your guide on which family’s behaviour to anticipate Full Safari Cost Guide — compare standard permit vs GHEX total cost Safari Itineraries — photography-focused and mixed wildlife trip shapes Further Reading Gorilla Trekking Photography: Camera Settings and Tips for Bwindi Golden hour photography in Bwindi: how to capture the forest’s most beautiful light Packing a safari photography kit: the essentials checklist for Bwindi Bwindi Impenetrable Forest – Gorilla Trekking in Uganda’s UNESCO Jungle Top Gorilla Trekking Destinations in Uganda – Bwindi vs. Mgahinga 2025 Black & White Photography Techniques to Try on a Gorilla Safari Chimpanzees Confirmed in Bwindi Forest Bwindi Forest: What Happened to the White-Bellied Duiker? Why Americans Choose Bwindi, Mgahinga, and Volcanoes Over the Museum Bwindi Forest Gorilla Trekking: An Unforgettable Journey
Yes — professional cameras, DSLRs, mirrorless bodies, and large telephoto lenses are all permitted on all Bwindi and Mgahinga gorilla treks. Tripods are technically allowed but impractical in dense forest terrain — a monopod is a better choice as it provides image stabilisation on one axis without obstructing movement. The only absolute restrictions are: no flash photography of any kind (disable before entering the forest), and the standard rules about noise and movement that apply to all trekkers. Professional video cameras are also permitted. What is the best time of day to photograph gorillas in Bwindi? All gorilla treks begin at 7–8 a.m. — this is the fixed schedule, not a choice. Morning encounters have the advantage of finding gorilla families in their nesting areas before they begin the day’s wide-ranging movement, which often means they are more stationary and easier to photograph. The light quality inside Bwindi’s forest is similarly low at any time of day due to the dense canopy, so morning does not offer a significant exposure advantage over afternoon. The one-hour time limit applies from first gorilla contact regardless of when the family is found. Which Bwindi sector is best for gorilla photography? Buhoma is generally considered the most photography-friendly sector because the forest canopy is slightly more open than Rushaga or Nkuringo, the terrain is more manageable (leaving more physical attention available for shooting), and some families are encountered in more open clearings. Rushaga’s Gorilla Habituation Experience (4 hours, USD $1,800) is the single best photography permit in either country — four times the time with the gorillas compared to a standard one-hour trek. For serious photographers, combining a standard Buhoma trek with a Rushaga GHEX on consecutive days is the optimal Bwindi photography itinerary. Will a smartphone camera produce good gorilla photos? Modern flagship smartphones (iPhone 15 Pro, Samsung Galaxy S24 Ultra, Google Pixel 9 Pro) can produce strong gorilla images in good conditions — when the gorilla is within 5–8 metres, relatively stationary, and you are in a patch of open canopy light. Their limitations show in the same conditions that challenge dedicated cameras: very low light, fast movement, and distances beyond 10 metres where optical zoom runs out. For most visitors whose goal is quality memories and social media sharing, a flagship smartphone is sufficient. For visitors whose primary goal is printable, publishable, or exhibition-quality images, a mirrorless or DSLR body with a fast telephoto lens is the better tool. Plan your gorilla photography safari Uganda Gorilla Permit Guide — booking process, sectors, GHEX details Bwindi Sector Comparison — choose the sector with the right terrain and light for photography All Uganda Gorilla Families — brief your guide on which family’s behaviour to anticipate Full Safari Cost Guide — compare standard permit vs GHEX total cost Safari Itineraries — photography-focused and mixed wildlife trip shapes Further Reading Gorilla Trekking Photography: Camera Settings and Tips for Bwindi Golden hour photography in Bwindi: how to capture the forest’s most beautiful light Packing a safari photography kit: the essentials checklist for Bwindi Bwindi Impenetrable Forest – Gorilla Trekking in Uganda’s UNESCO Jungle Top Gorilla Trekking Destinations in Uganda – Bwindi vs. Mgahinga 2025 Black & White Photography Techniques to Try on a Gorilla Safari Chimpanzees Confirmed in Bwindi Forest Bwindi Forest: What Happened to the White-Bellied Duiker? Why Americans Choose Bwindi, Mgahinga, and Volcanoes Over the Museum Bwindi Forest Gorilla Trekking: An Unforgettable Journey
All gorilla treks begin at 7–8 a.m. — this is the fixed schedule, not a choice. Morning encounters have the advantage of finding gorilla families in their nesting areas before they begin the day’s wide-ranging movement, which often means they are more stationary and easier to photograph. The light quality inside Bwindi’s forest is similarly low at any time of day due to the dense canopy, so morning does not offer a significant exposure advantage over afternoon. The one-hour time limit applies from first gorilla contact regardless of when the family is found. Which Bwindi sector is best for gorilla photography? Buhoma is generally considered the most photography-friendly sector because the forest canopy is slightly more open than Rushaga or Nkuringo, the terrain is more manageable (leaving more physical attention available for shooting), and some families are encountered in more open clearings. Rushaga’s Gorilla Habituation Experience (4 hours, USD $1,800) is the single best photography permit in either country — four times the time with the gorillas compared to a standard one-hour trek. For serious photographers, combining a standard Buhoma trek with a Rushaga GHEX on consecutive days is the optimal Bwindi photography itinerary. Will a smartphone camera produce good gorilla photos? Modern flagship smartphones (iPhone 15 Pro, Samsung Galaxy S24 Ultra, Google Pixel 9 Pro) can produce strong gorilla images in good conditions — when the gorilla is within 5–8 metres, relatively stationary, and you are in a patch of open canopy light. Their limitations show in the same conditions that challenge dedicated cameras: very low light, fast movement, and distances beyond 10 metres where optical zoom runs out. For most visitors whose goal is quality memories and social media sharing, a flagship smartphone is sufficient. For visitors whose primary goal is printable, publishable, or exhibition-quality images, a mirrorless or DSLR body with a fast telephoto lens is the better tool. Plan your gorilla photography safari Uganda Gorilla Permit Guide — booking process, sectors, GHEX details Bwindi Sector Comparison — choose the sector with the right terrain and light for photography All Uganda Gorilla Families — brief your guide on which family’s behaviour to anticipate Full Safari Cost Guide — compare standard permit vs GHEX total cost Safari Itineraries — photography-focused and mixed wildlife trip shapes Further Reading Gorilla Trekking Photography: Camera Settings and Tips for Bwindi Golden hour photography in Bwindi: how to capture the forest’s most beautiful light Packing a safari photography kit: the essentials checklist for Bwindi Bwindi Impenetrable Forest – Gorilla Trekking in Uganda’s UNESCO Jungle Top Gorilla Trekking Destinations in Uganda – Bwindi vs. Mgahinga 2025 Black & White Photography Techniques to Try on a Gorilla Safari Chimpanzees Confirmed in Bwindi Forest Bwindi Forest: What Happened to the White-Bellied Duiker? Why Americans Choose Bwindi, Mgahinga, and Volcanoes Over the Museum Bwindi Forest Gorilla Trekking: An Unforgettable Journey
Buhoma is generally considered the most photography-friendly sector because the forest canopy is slightly more open than Rushaga or Nkuringo, the terrain is more manageable (leaving more physical attention available for shooting), and some families are encountered in more open clearings. Rushaga’s Gorilla Habituation Experience (4 hours, USD $1,800) is the single best photography permit in either country — four times the time with the gorillas compared to a standard one-hour trek. For serious photographers, combining a standard Buhoma trek with a Rushaga GHEX on consecutive days is the optimal Bwindi photography itinerary. Will a smartphone camera produce good gorilla photos? Modern flagship smartphones (iPhone 15 Pro, Samsung Galaxy S24 Ultra, Google Pixel 9 Pro) can produce strong gorilla images in good conditions — when the gorilla is within 5–8 metres, relatively stationary, and you are in a patch of open canopy light. Their limitations show in the same conditions that challenge dedicated cameras: very low light, fast movement, and distances beyond 10 metres where optical zoom runs out. For most visitors whose goal is quality memories and social media sharing, a flagship smartphone is sufficient. For visitors whose primary goal is printable, publishable, or exhibition-quality images, a mirrorless or DSLR body with a fast telephoto lens is the better tool. Plan your gorilla photography safari Uganda Gorilla Permit Guide — booking process, sectors, GHEX details Bwindi Sector Comparison — choose the sector with the right terrain and light for photography All Uganda Gorilla Families — brief your guide on which family’s behaviour to anticipate Full Safari Cost Guide — compare standard permit vs GHEX total cost Safari Itineraries — photography-focused and mixed wildlife trip shapes Further Reading Gorilla Trekking Photography: Camera Settings and Tips for Bwindi Golden hour photography in Bwindi: how to capture the forest’s most beautiful light Packing a safari photography kit: the essentials checklist for Bwindi Bwindi Impenetrable Forest – Gorilla Trekking in Uganda’s UNESCO Jungle Top Gorilla Trekking Destinations in Uganda – Bwindi vs. Mgahinga 2025 Black & White Photography Techniques to Try on a Gorilla Safari Chimpanzees Confirmed in Bwindi Forest Bwindi Forest: What Happened to the White-Bellied Duiker? Why Americans Choose Bwindi, Mgahinga, and Volcanoes Over the Museum Bwindi Forest Gorilla Trekking: An Unforgettable Journey
Modern flagship smartphones (iPhone 15 Pro, Samsung Galaxy S24 Ultra, Google Pixel 9 Pro) can produce strong gorilla images in good conditions — when the gorilla is within 5–8 metres, relatively stationary, and you are in a patch of open canopy light. Their limitations show in the same conditions that challenge dedicated cameras: very low light, fast movement, and distances beyond 10 metres where optical zoom runs out. For most visitors whose goal is quality memories and social media sharing, a flagship smartphone is sufficient. For visitors whose primary goal is printable, publishable, or exhibition-quality images, a mirrorless or DSLR body with a fast telephoto lens is the better tool. Plan your gorilla photography safari Uganda Gorilla Permit Guide — booking process, sectors, GHEX details Bwindi Sector Comparison — choose the sector with the right terrain and light for photography All Uganda Gorilla Families — brief your guide on which family’s behaviour to anticipate Full Safari Cost Guide — compare standard permit vs GHEX total cost Safari Itineraries — photography-focused and mixed wildlife trip shapes Further Reading Gorilla Trekking Photography: Camera Settings and Tips for Bwindi Golden hour photography in Bwindi: how to capture the forest’s most beautiful light Packing a safari photography kit: the essentials checklist for Bwindi Bwindi Impenetrable Forest – Gorilla Trekking in Uganda’s UNESCO Jungle Top Gorilla Trekking Destinations in Uganda – Bwindi vs. Mgahinga 2025 Black & White Photography Techniques to Try on a Gorilla Safari Chimpanzees Confirmed in Bwindi Forest Bwindi Forest: What Happened to the White-Bellied Duiker? Why Americans Choose Bwindi, Mgahinga, and Volcanoes Over the Museum Bwindi Forest Gorilla Trekking: An Unforgettable Journey