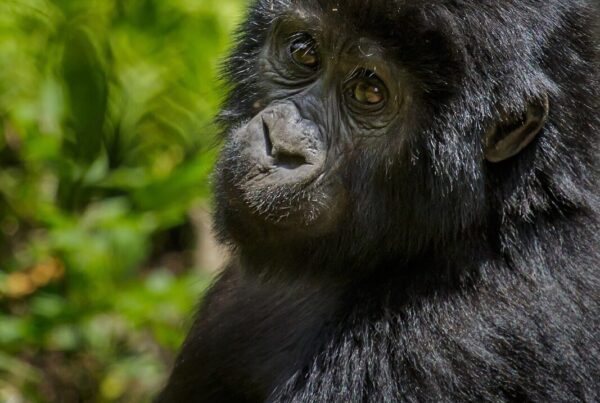
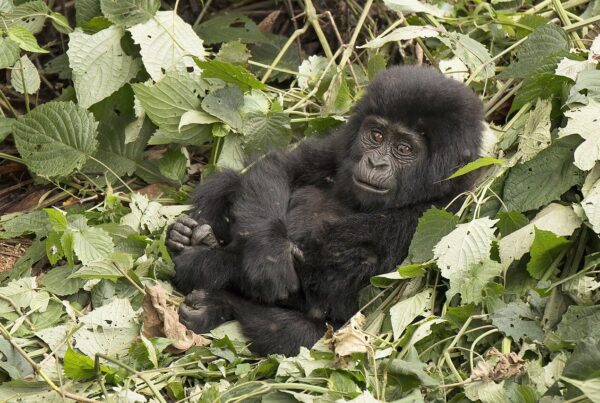
Gorilla trekking at Bwindi is simultaneously one of the most technically demanding and most rewarding wildlife photography situations available anywhere in the world — technically demanding because the encounter conditions (dark forest interior, unpredictable subject movement, proximity that exceeds most telephoto lenses’ minimum focus distance, one-hour window that cannot be repeated) require camera handling that is more similar to professional sports photography than to the open-air game drive safari photography that most wildlife photographers have practised; and rewarding because the subject — a mountain gorilla family in its natural highland forest habitat — provides images of depth, character, and emotional impact that are difficult to achieve at any other wildlife encounter. This guide covers gorilla photography at Bwindi from pre-trip kit preparation through the encounter’s 60 minutes to post-processing — the specific decisions, techniques, and approaches that consistently produce the best results in the conditions that Bwindi’s forest creates. For trek planning, see the Bwindi sector guide.
Gorilla Photography at Bwindi: Essential Kit
- Primary lens: 70-200mm f/2.8 (most versatile for forest encounter distances and light conditions)
- Secondary lens: 24-70mm f/2.8 (for environmental portraits when silverback approaches closely)
- ISO range: Expect ISO 3200-6400 in forest interior — full-frame sensor camera strongly recommended
- Shutter speed minimum: 1/250s for freezing gorilla movement — may require ISO 6400+ in dark sections
- Flash: Prohibited in the encounter — manage entirely with natural light and high ISO
- Memory cards: UHS-II V60 or V90 minimum for burst shooting; carry 3+ formatted cards; 64-128 GB capacity each
Gorilla trekking is one of the most challenging and rewarding wildlife photography opportunities in the world. The light is unpredictable, the forest is dark, the gorillas move, and you have one hour. This guide covers the specific photography considerations for gorilla trekking in Uganda in 2027 — from camera settings to guide selection to the ethics and rules of photographing mountain gorillas at close range.
The Photography Challenge: What You Are Actually Dealing With
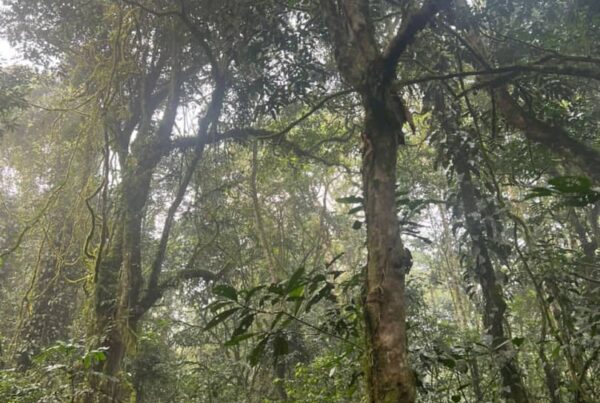
The forest floor at Bwindi is dark. Even on a bright morning, the canopy filters light to a fraction of what you would have in open savanna. You are shooting at ISO 1600 to 6400 in many situations. You are at very close range (7m minimum distance required). You have no tripod. The gorillas move constantly — feeding, walking, playing — and you cannot direct them. You have exactly 60 minutes with the group. These are the conditions. Your camera settings, lens choice, and technique all need to be calibrated to this specific environment.
Camera Settings for Gorilla Trekking
Start with Aperture Priority (Av) mode, widest aperture available on your lens (f/2.8 to f/4 for most zoom lenses), ISO Auto with a ceiling of 6400 (or 12800 if your camera handles high ISO well), and minimum shutter speed 1/250s to freeze gorilla movement. In very dark conditions, switch to Manual mode: ISO 3200 to 6400, aperture wide open, shutter 1/125s minimum (sacrifice some sharpness for more light in extremely dark situations).
White balance: set to Shade or Cloudy (not Auto), which warms the image and compensates for the cool green cast of forest light. Shoot RAW — you will want the flexibility in post-processing that RAW provides, especially for shadow recovery. JPEG images from forest interiors are difficult to recover in post; RAW files give you 3 to 5 extra stops of recovery range.
Autofocus: continuous AF (AI Servo on Canon, AF-C on Nikon/Sony), using eye detection AF if available. Gorilla eyes are the focus priority for portraits. For active gorillas (juveniles playing, silverback moving), all-point tracking AF works better than single-point. Keep your burst rate moderate (3 to 5fps) — high-speed burst fills your buffer quickly and produces hundreds of near-identical frames you then have to cull.
Lens Recommendations
The most useful focal length range for gorilla photography is 70 to 200mm. A 70-200mm f/2.8 is the professional standard for this situation — the f/2.8 aperture is genuinely important for forest light, and the zoom flexibility covers everything from wide environmental shots (70mm) to tight portrait work (200mm). At 7m minimum distance, 200mm produces a gorilla that fills approximately 40 to 50 percent of the frame on a full-frame sensor — tighter on a crop sensor.
A 100-400mm or 100-500mm telephoto adds reach but at slower maximum apertures (f/4.5 to f/6.3) that become a liability in dark forest conditions. Use a long telephoto only if you have a camera body that handles high ISO extremely well (Sony A7S III, Nikon Z9, Canon R3 level). For most photographers, 70-200mm f/2.8 is the better choice than 100-400mm f/5.6 in this specific environment.
A 24-70mm f/2.8 as a second lens allows for wider environmental shots showing the forest context. Some photographers bring a prime (50mm f/1.4 or 85mm f/1.8) for the maximum possible light gathering in extremely dark moments. Avoid teleconverters in forest conditions — the light penalty outweighs the reach gain.
Flash: The Rules and the Workarounds
Direct flash (including pop-up flash) is prohibited during the gorilla encounter. UWA rangers enforce this rule strictly. The prohibition exists because gorillas respond negatively to direct flash — it can cause distress and alter their behaviour. The rule applies to all flash types including smartphone flash.
This does not mean all artificial light is prohibited. A small LED video light (constant light, not flash) can be used discreetly to lift shadows in extremely dark situations — this is not explicitly prohibited in the same way as flash, but use your judgment and your guide’s guidance in the moment. The practical workaround is high ISO and wider aperture rather than supplementary light. Modern camera sensors at ISO 6400 produce images that are usable with good post-processing.
Choosing Your Guide for Photography
Your guide determines more of your photography outcome than your camera. A guide who understands photographic composition, knows when to position the group for the best light, allows unhurried time in good positions, and anticipates gorilla movement before it happens produces consistently better photography conditions than an otherwise excellent guide who is unaware of photographic priorities. When booking your gorilla trek, tell your operator explicitly that photography is your primary purpose. Ask about guides with specific photography experience or training. The difference in results between a photography-aware guide and a general guide is significant.
Some operators offer private photography treks where the guide is specifically selected for photography expertise and the group size is minimised for better positioning. If photography is the primary purpose of your trek, enquire about private trek options — the premium over a standard group trek is justified if you are carrying a significant camera investment.
What to Photograph: Specific Subjects
Silverback portrait: the most iconic image. Position yourself for the face, not the back. The guide knows the dominant silverback’s behaviour — ask them to let you know when the silverback is likely to face your direction. Patience and a good guide position produce this image consistently.
Mother and infant: emotionally compelling and frequently the most shared images from a gorilla trek. Infants are curious and active — they will often approach your group more closely than the minimum distance rule suggests the encounter should go. Stay still and let them lead. Your guide will manage the distance.
Forest context: use 24-70mm or your widest available lens to capture a gorilla in context — framed by vegetation, dappled light through the canopy, the scale of the forest around them. These environmental images tell a richer story than tight portraits alone.
Eye contact: the most affecting image you can take from a gorilla encounter is direct eye contact between you and a gorilla. It requires patience, a good position, and a camera already raised when the moment comes. Keep your camera to your eye more than away from it during the encounter — the moments happen quickly and without warning.
Protecting Your Equipment
Bwindi is a tropical forest. Humidity is high and rain is possible at any time of year. Use a rain cover for your camera at all times — a simple plastic rain cover that fits over your body and lens combination costs a few dollars and protects thousands of dollars of equipment. Keep a microfibre cloth accessible for lens wiping. Condensation from warm humid air on a cooler camera is a real issue — allow your camera to warm up to ambient temperature before removing it from a bag in cold/warm transition (such as coming out of a cool vehicle into warm humid forest air).
Bring more memory cards than you think you need. 64GB minimum per card, two cards minimum. Bring more battery capacity than you think you need — cold nights at altitude drain batteries faster than you expect. A battery grip (which doubles battery capacity) is worth considering for a full day of shooting including the trek.
The Permit and Booking
The gorilla trekking permit costs $800 USD per person. For photography purposes, the best investment is pairing the permit with a private trek arrangement (if available for your sector and date) and a specifically photography-experienced guide. We can advise on current guide availability and photography trek options across all Bwindi sectors for 2027. Contact us with your photography goals and equipment level when enquiring — it helps us match you with the right guide and sector for the images you want to make.
Frequently Asked Questions
The camera settings for gorilla photography at Bwindi require a departure from the settings that work for open-air game drive photography. The primary challenge: the forest interior reduces light to 1-5% of open sky illumination, requiring high ISO settings to achieve the minimum shutter speeds needed to freeze gorilla movement. The recommended starting settings for most conditions in the forest encounter: aperture priority mode at f/2.8-f/4 (widest available aperture for maximum light gathering); auto-ISO with maximum set at 12800 (the camera selects ISO automatically to maintain the chosen shutter speed); minimum shutter speed 1/250s (set via auto-ISO minimum shutter speed setting, available on most modern mirrorless cameras). In practice, these settings typically produce ISO 3200-8000 in the forest interior. When the gorillas are in a forest opening or well-lit clearing, the ISO drops to 800-1600 and the image quality improves significantly. For burst shooting during active movement (mock charge, display, rapid movement through vegetation): switch to manual mode at the fastest achievable settings (1/500s, f/2.8, ISO 6400) to maximise shutter speed for motion freezing. Modern full-frame mirrorless cameras (Sony A7 series, Nikon Z series, Canon R series) produce usable image quality at ISO 6400-8000 that is adequate for large-print output; APS-C sensor cameras struggle significantly more with the forest ISO requirements. What are the most important gorilla photographs to capture during the 60-minute encounter? The 60-minute encounter at Bwindi can be divided into a photography shot list that maximises the range of images while leaving time for camera-free observation. The essential categories: the silverback portrait (face, eyes, and expression — the defining image of the encounter; wait for the moment when the silverback is still, facing your direction, and the eyes have the specific quality of awareness that makes the portrait work); the environmental portrait (silverback or a family group within the forest context — include tree trunks, vegetation, and light quality as environmental elements rather than pure subject isolation); the family social interaction (grooming between adults, juvenile play, mother-infant nursing or carrying — the family dynamic images that convey the gorilla social structure); the action sequence (movement through vegetation, display, chest beat, branch throw — unpredictable moments that require burst mode and fast shutter); and the close detail (hand or foot placement, fur texture, eye colour on a calm individual at close range — requires the gorilla to be settled and close, available in the encounter’s quieter middle period). The common photography mistake: spending the entire encounter shooting the silverback and missing the family dynamic images that tell the full story of the encounter. The silverback is the dominant image but the family is the encounter. How do you photograph gorilla infants and juveniles effectively? Gorilla infants and juveniles are often the most photographically accessible and emotionally engaging subjects of the encounter — they are active, positioned lower to the ground than the adults (making eye-level photography easier), and frequently approach the visitor group with a curiosity that produces close encounters at 3-5 metres. The photography approach for infants and juveniles: position for eye-level contact (the most powerful angle for primate portraits is at or below the subject’s eye level — crouching or kneeling on the forest floor brings you to juvenile gorilla eye level more effectively than standing); use a moderate focal length (85-135mm equivalent) for close approach portraits that include facial expression without excessive telephoto compression; be ready for rapid movement (juveniles play-run, tumble, and swing through vegetation suddenly — keep finger on the shutter trigger and shutter speed at 1/500s minimum when juveniles are active). The most memorable juvenile gorilla image: eye contact at close range during a moment of direct curiosity — the juvenile approaching the visitor group and pausing to look directly at the camera. This moment requires the photographer to be ready rather than actively moving and hunting the frame — position, wait, and be prepared when it happens rather than pursuing it actively, which triggers movement. Is video or photography better for a gorilla trekking encounter? The video versus photography choice for the gorilla encounter is a genuine creative decision that has no universally correct answer, but the considerations are specific to the encounter format. The case for photography: still images of gorillas — particularly the face portraits with eye contact — convey the quality of the encounter’s most powerful moments more effectively than video, because the still frame allows extended attention on a single expression that video moves past in a fraction of a second; still photography technique (aperture, depth of field, composition framing) gives more creative control over the image’s aesthetic qualities; and the photography portfolio from a well-executed encounter produces 5-20 images of lasting value rather than hours of footage of which 30 seconds is shareable. The case for video: the encounter’s sounds (the silverback’s breathing, the family’s vocalisation, the forest ambient sound), movement (the gorilla moving through vegetation, the silverback’s posture shifts, the juvenile play sequences), and duration cannot be conveyed in a still frame — video captures the temporal dimension of the encounter that still photography cannot; smartphone video shared immediately after the trek reaches the photographer’s social network with more emotional immediacy than edited stills. The practical approach: carry both a camera with a stills/video capability and plan explicitly how to allocate the encounter time — a dedicated 20-minute video period and a dedicated 30-minute stills period rather than switching randomly between modes throughout. What post-processing adjustments work best for Bwindi gorilla photographs? Post-processing Bwindi gorilla photographs in Lightroom, Capture One, or equivalent RAW processing software addresses the specific exposure and colour characteristics of forest-interior wildlife photography. The standard adjustment sequence: start with exposure correction (forest-light gorilla RAW files are typically 0.5-1.5 stops underexposed relative to the intended output brightness — lift the exposure slider before assessing other adjustments); apply highlight recovery (if sky or bright canopy gaps are in the frame, recover highlights to prevent blown sky); lift shadows (the forest floor and shadow areas of the gorilla’s black fur have detail recoverable in RAW that was invisible in the camera preview — shadow lifting reveals this detail); adjust white balance (forest light is typically cooler/bluer than the 5500K daylight default — warming to 5800-6500K produces more natural-looking fur colour); apply noise reduction (ISO 3200-6400 files need luminance noise reduction — be conservative to avoid losing fur texture detail); sharpen carefully (the texture sharpening tool in Lightroom/Lightroom Classic applied specifically to the fur zone produces the best results without sharpening the noise in smooth areas). The most common post-processing mistake with gorilla images: over-clarifying or over-sharpening to compensate for soft focus that the sharpening cannot recover — a soft image is a camera technique issue to address on the next encounter, not a post-processing problem. Prepare your photography for the Bwindi gorilla encounter Bwindi Sector Guide — sector light conditions and encounter habitat for photography planning Uganda Gorilla Families — family activity levels and habitat that determine the photographic situation Gorilla Permit Guide — securing the permit for the encounter this photography guide prepares you for Full Safari Cost Guide — trip budget including photography equipment preparation Safari Itineraries — Uganda photography safari itineraries optimised for the full wildlife and landscape circuit Further Reading Uganda Gorilla Trekking: Sample Day-by-Day Schedule and What Each Day Looks Like What Do Gorillas Smell Like Up Close? The Honest Answer What a Gorilla Smells Like Up Close: Nobody Talks About This What It Feels Like When a Gorilla Charges at You and Stops Gorillas Have Human-Like Fingerprints: Scientists Can Tell Them Apart What Bwindi Impenetrable Forest Looks Like From the Air: Drone Footage 9 Things Gorillas Do That Look Exactly Like What Humans Do What Gorilla Trekking Looks Like in Every Month of the Year: Photo Guide What 30 Years of Mountain Gorilla Conservation Looked Like on the Ground Gorilla Trekking for People Who Don’t Like Safaris: Why It Is Different <
The 60-minute encounter at Bwindi can be divided into a photography shot list that maximises the range of images while leaving time for camera-free observation. The essential categories: the silverback portrait (face, eyes, and expression — the defining image of the encounter; wait for the moment when the silverback is still, facing your direction, and the eyes have the specific quality of awareness that makes the portrait work); the environmental portrait (silverback or a family group within the forest context — include tree trunks, vegetation, and light quality as environmental elements rather than pure subject isolation); the family social interaction (grooming between adults, juvenile play, mother-infant nursing or carrying — the family dynamic images that convey the gorilla social structure); the action sequence (movement through vegetation, display, chest beat, branch throw — unpredictable moments that require burst mode and fast shutter); and the close detail (hand or foot placement, fur texture, eye colour on a calm individual at close range — requires the gorilla to be settled and close, available in the encounter’s quieter middle period). The common photography mistake: spending the entire encounter shooting the silverback and missing the family dynamic images that tell the full story of the encounter. The silverback is the dominant image but the family is the encounter. How do you photograph gorilla infants and juveniles effectively? Gorilla infants and juveniles are often the most photographically accessible and emotionally engaging subjects of the encounter — they are active, positioned lower to the ground than the adults (making eye-level photography easier), and frequently approach the visitor group with a curiosity that produces close encounters at 3-5 metres. The photography approach for infants and juveniles: position for eye-level contact (the most powerful angle for primate portraits is at or below the subject’s eye level — crouching or kneeling on the forest floor brings you to juvenile gorilla eye level more effectively than standing); use a moderate focal length (85-135mm equivalent) for close approach portraits that include facial expression without excessive telephoto compression; be ready for rapid movement (juveniles play-run, tumble, and swing through vegetation suddenly — keep finger on the shutter trigger and shutter speed at 1/500s minimum when juveniles are active). The most memorable juvenile gorilla image: eye contact at close range during a moment of direct curiosity — the juvenile approaching the visitor group and pausing to look directly at the camera. This moment requires the photographer to be ready rather than actively moving and hunting the frame — position, wait, and be prepared when it happens rather than pursuing it actively, which triggers movement. Is video or photography better for a gorilla trekking encounter? The video versus photography choice for the gorilla encounter is a genuine creative decision that has no universally correct answer, but the considerations are specific to the encounter format. The case for photography: still images of gorillas — particularly the face portraits with eye contact — convey the quality of the encounter’s most powerful moments more effectively than video, because the still frame allows extended attention on a single expression that video moves past in a fraction of a second; still photography technique (aperture, depth of field, composition framing) gives more creative control over the image’s aesthetic qualities; and the photography portfolio from a well-executed encounter produces 5-20 images of lasting value rather than hours of footage of which 30 seconds is shareable. The case for video: the encounter’s sounds (the silverback’s breathing, the family’s vocalisation, the forest ambient sound), movement (the gorilla moving through vegetation, the silverback’s posture shifts, the juvenile play sequences), and duration cannot be conveyed in a still frame — video captures the temporal dimension of the encounter that still photography cannot; smartphone video shared immediately after the trek reaches the photographer’s social network with more emotional immediacy than edited stills. The practical approach: carry both a camera with a stills/video capability and plan explicitly how to allocate the encounter time — a dedicated 20-minute video period and a dedicated 30-minute stills period rather than switching randomly between modes throughout. What post-processing adjustments work best for Bwindi gorilla photographs? Post-processing Bwindi gorilla photographs in Lightroom, Capture One, or equivalent RAW processing software addresses the specific exposure and colour characteristics of forest-interior wildlife photography. The standard adjustment sequence: start with exposure correction (forest-light gorilla RAW files are typically 0.5-1.5 stops underexposed relative to the intended output brightness — lift the exposure slider before assessing other adjustments); apply highlight recovery (if sky or bright canopy gaps are in the frame, recover highlights to prevent blown sky); lift shadows (the forest floor and shadow areas of the gorilla’s black fur have detail recoverable in RAW that was invisible in the camera preview — shadow lifting reveals this detail); adjust white balance (forest light is typically cooler/bluer than the 5500K daylight default — warming to 5800-6500K produces more natural-looking fur colour); apply noise reduction (ISO 3200-6400 files need luminance noise reduction — be conservative to avoid losing fur texture detail); sharpen carefully (the texture sharpening tool in Lightroom/Lightroom Classic applied specifically to the fur zone produces the best results without sharpening the noise in smooth areas). The most common post-processing mistake with gorilla images: over-clarifying or over-sharpening to compensate for soft focus that the sharpening cannot recover — a soft image is a camera technique issue to address on the next encounter, not a post-processing problem. Prepare your photography for the Bwindi gorilla encounter Bwindi Sector Guide — sector light conditions and encounter habitat for photography planning Uganda Gorilla Families — family activity levels and habitat that determine the photographic situation Gorilla Permit Guide — securing the permit for the encounter this photography guide prepares you for Full Safari Cost Guide — trip budget including photography equipment preparation Safari Itineraries — Uganda photography safari itineraries optimised for the full wildlife and landscape circuit Further Reading Uganda Gorilla Trekking: Sample Day-by-Day Schedule and What Each Day Looks Like What Do Gorillas Smell Like Up Close? The Honest Answer What a Gorilla Smells Like Up Close: Nobody Talks About This What It Feels Like When a Gorilla Charges at You and Stops Gorillas Have Human-Like Fingerprints: Scientists Can Tell Them Apart What Bwindi Impenetrable Forest Looks Like From the Air: Drone Footage 9 Things Gorillas Do That Look Exactly Like What Humans Do What Gorilla Trekking Looks Like in Every Month of the Year: Photo Guide What 30 Years of Mountain Gorilla Conservation Looked Like on the Ground Gorilla Trekking for People Who Don’t Like Safaris: Why It Is Different <
Gorilla infants and juveniles are often the most photographically accessible and emotionally engaging subjects of the encounter — they are active, positioned lower to the ground than the adults (making eye-level photography easier), and frequently approach the visitor group with a curiosity that produces close encounters at 3-5 metres. The photography approach for infants and juveniles: position for eye-level contact (the most powerful angle for primate portraits is at or below the subject’s eye level — crouching or kneeling on the forest floor brings you to juvenile gorilla eye level more effectively than standing); use a moderate focal length (85-135mm equivalent) for close approach portraits that include facial expression without excessive telephoto compression; be ready for rapid movement (juveniles play-run, tumble, and swing through vegetation suddenly — keep finger on the shutter trigger and shutter speed at 1/500s minimum when juveniles are active). The most memorable juvenile gorilla image: eye contact at close range during a moment of direct curiosity — the juvenile approaching the visitor group and pausing to look directly at the camera. This moment requires the photographer to be ready rather than actively moving and hunting the frame — position, wait, and be prepared when it happens rather than pursuing it actively, which triggers movement. Is video or photography better for a gorilla trekking encounter? The video versus photography choice for the gorilla encounter is a genuine creative decision that has no universally correct answer, but the considerations are specific to the encounter format. The case for photography: still images of gorillas — particularly the face portraits with eye contact — convey the quality of the encounter’s most powerful moments more effectively than video, because the still frame allows extended attention on a single expression that video moves past in a fraction of a second; still photography technique (aperture, depth of field, composition framing) gives more creative control over the image’s aesthetic qualities; and the photography portfolio from a well-executed encounter produces 5-20 images of lasting value rather than hours of footage of which 30 seconds is shareable. The case for video: the encounter’s sounds (the silverback’s breathing, the family’s vocalisation, the forest ambient sound), movement (the gorilla moving through vegetation, the silverback’s posture shifts, the juvenile play sequences), and duration cannot be conveyed in a still frame — video captures the temporal dimension of the encounter that still photography cannot; smartphone video shared immediately after the trek reaches the photographer’s social network with more emotional immediacy than edited stills. The practical approach: carry both a camera with a stills/video capability and plan explicitly how to allocate the encounter time — a dedicated 20-minute video period and a dedicated 30-minute stills period rather than switching randomly between modes throughout. What post-processing adjustments work best for Bwindi gorilla photographs? Post-processing Bwindi gorilla photographs in Lightroom, Capture One, or equivalent RAW processing software addresses the specific exposure and colour characteristics of forest-interior wildlife photography. The standard adjustment sequence: start with exposure correction (forest-light gorilla RAW files are typically 0.5-1.5 stops underexposed relative to the intended output brightness — lift the exposure slider before assessing other adjustments); apply highlight recovery (if sky or bright canopy gaps are in the frame, recover highlights to prevent blown sky); lift shadows (the forest floor and shadow areas of the gorilla’s black fur have detail recoverable in RAW that was invisible in the camera preview — shadow lifting reveals this detail); adjust white balance (forest light is typically cooler/bluer than the 5500K daylight default — warming to 5800-6500K produces more natural-looking fur colour); apply noise reduction (ISO 3200-6400 files need luminance noise reduction — be conservative to avoid losing fur texture detail); sharpen carefully (the texture sharpening tool in Lightroom/Lightroom Classic applied specifically to the fur zone produces the best results without sharpening the noise in smooth areas). The most common post-processing mistake with gorilla images: over-clarifying or over-sharpening to compensate for soft focus that the sharpening cannot recover — a soft image is a camera technique issue to address on the next encounter, not a post-processing problem. Prepare your photography for the Bwindi gorilla encounter Bwindi Sector Guide — sector light conditions and encounter habitat for photography planning Uganda Gorilla Families — family activity levels and habitat that determine the photographic situation Gorilla Permit Guide — securing the permit for the encounter this photography guide prepares you for Full Safari Cost Guide — trip budget including photography equipment preparation Safari Itineraries — Uganda photography safari itineraries optimised for the full wildlife and landscape circuit Further Reading Uganda Gorilla Trekking: Sample Day-by-Day Schedule and What Each Day Looks Like What Do Gorillas Smell Like Up Close? The Honest Answer What a Gorilla Smells Like Up Close: Nobody Talks About This What It Feels Like When a Gorilla Charges at You and Stops Gorillas Have Human-Like Fingerprints: Scientists Can Tell Them Apart What Bwindi Impenetrable Forest Looks Like From the Air: Drone Footage 9 Things Gorillas Do That Look Exactly Like What Humans Do What Gorilla Trekking Looks Like in Every Month of the Year: Photo Guide What 30 Years of Mountain Gorilla Conservation Looked Like on the Ground Gorilla Trekking for People Who Don’t Like Safaris: Why It Is Different <
The video versus photography choice for the gorilla encounter is a genuine creative decision that has no universally correct answer, but the considerations are specific to the encounter format. The case for photography: still images of gorillas — particularly the face portraits with eye contact — convey the quality of the encounter’s most powerful moments more effectively than video, because the still frame allows extended attention on a single expression that video moves past in a fraction of a second; still photography technique (aperture, depth of field, composition framing) gives more creative control over the image’s aesthetic qualities; and the photography portfolio from a well-executed encounter produces 5-20 images of lasting value rather than hours of footage of which 30 seconds is shareable. The case for video: the encounter’s sounds (the silverback’s breathing, the family’s vocalisation, the forest ambient sound), movement (the gorilla moving through vegetation, the silverback’s posture shifts, the juvenile play sequences), and duration cannot be conveyed in a still frame — video captures the temporal dimension of the encounter that still photography cannot; smartphone video shared immediately after the trek reaches the photographer’s social network with more emotional immediacy than edited stills. The practical approach: carry both a camera with a stills/video capability and plan explicitly how to allocate the encounter time — a dedicated 20-minute video period and a dedicated 30-minute stills period rather than switching randomly between modes throughout. What post-processing adjustments work best for Bwindi gorilla photographs? Post-processing Bwindi gorilla photographs in Lightroom, Capture One, or equivalent RAW processing software addresses the specific exposure and colour characteristics of forest-interior wildlife photography. The standard adjustment sequence: start with exposure correction (forest-light gorilla RAW files are typically 0.5-1.5 stops underexposed relative to the intended output brightness — lift the exposure slider before assessing other adjustments); apply highlight recovery (if sky or bright canopy gaps are in the frame, recover highlights to prevent blown sky); lift shadows (the forest floor and shadow areas of the gorilla’s black fur have detail recoverable in RAW that was invisible in the camera preview — shadow lifting reveals this detail); adjust white balance (forest light is typically cooler/bluer than the 5500K daylight default — warming to 5800-6500K produces more natural-looking fur colour); apply noise reduction (ISO 3200-6400 files need luminance noise reduction — be conservative to avoid losing fur texture detail); sharpen carefully (the texture sharpening tool in Lightroom/Lightroom Classic applied specifically to the fur zone produces the best results without sharpening the noise in smooth areas). The most common post-processing mistake with gorilla images: over-clarifying or over-sharpening to compensate for soft focus that the sharpening cannot recover — a soft image is a camera technique issue to address on the next encounter, not a post-processing problem. Prepare your photography for the Bwindi gorilla encounter Bwindi Sector Guide — sector light conditions and encounter habitat for photography planning Uganda Gorilla Families — family activity levels and habitat that determine the photographic situation Gorilla Permit Guide — securing the permit for the encounter this photography guide prepares you for Full Safari Cost Guide — trip budget including photography equipment preparation Safari Itineraries — Uganda photography safari itineraries optimised for the full wildlife and landscape circuit Further Reading Uganda Gorilla Trekking: Sample Day-by-Day Schedule and What Each Day Looks Like What Do Gorillas Smell Like Up Close? The Honest Answer What a Gorilla Smells Like Up Close: Nobody Talks About This What It Feels Like When a Gorilla Charges at You and Stops Gorillas Have Human-Like Fingerprints: Scientists Can Tell Them Apart What Bwindi Impenetrable Forest Looks Like From the Air: Drone Footage 9 Things Gorillas Do That Look Exactly Like What Humans Do What Gorilla Trekking Looks Like in Every Month of the Year: Photo Guide What 30 Years of Mountain Gorilla Conservation Looked Like on the Ground Gorilla Trekking for People Who Don’t Like Safaris: Why It Is Different <
Post-processing Bwindi gorilla photographs in Lightroom, Capture One, or equivalent RAW processing software addresses the specific exposure and colour characteristics of forest-interior wildlife photography. The standard adjustment sequence: start with exposure correction (forest-light gorilla RAW files are typically 0.5-1.5 stops underexposed relative to the intended output brightness — lift the exposure slider before assessing other adjustments); apply highlight recovery (if sky or bright canopy gaps are in the frame, recover highlights to prevent blown sky); lift shadows (the forest floor and shadow areas of the gorilla’s black fur have detail recoverable in RAW that was invisible in the camera preview — shadow lifting reveals this detail); adjust white balance (forest light is typically cooler/bluer than the 5500K daylight default — warming to 5800-6500K produces more natural-looking fur colour); apply noise reduction (ISO 3200-6400 files need luminance noise reduction — be conservative to avoid losing fur texture detail); sharpen carefully (the texture sharpening tool in Lightroom/Lightroom Classic applied specifically to the fur zone produces the best results without sharpening the noise in smooth areas). The most common post-processing mistake with gorilla images: over-clarifying or over-sharpening to compensate for soft focus that the sharpening cannot recover — a soft image is a camera technique issue to address on the next encounter, not a post-processing problem. Prepare your photography for the Bwindi gorilla encounter Bwindi Sector Guide — sector light conditions and encounter habitat for photography planning Uganda Gorilla Families — family activity levels and habitat that determine the photographic situation Gorilla Permit Guide — securing the permit for the encounter this photography guide prepares you for Full Safari Cost Guide — trip budget including photography equipment preparation Safari Itineraries — Uganda photography safari itineraries optimised for the full wildlife and landscape circuit Further Reading Uganda Gorilla Trekking: Sample Day-by-Day Schedule and What Each Day Looks Like What Do Gorillas Smell Like Up Close? The Honest Answer What a Gorilla Smells Like Up Close: Nobody Talks About This What It Feels Like When a Gorilla Charges at You and Stops Gorillas Have Human-Like Fingerprints: Scientists Can Tell Them Apart What Bwindi Impenetrable Forest Looks Like From the Air: Drone Footage 9 Things Gorillas Do That Look Exactly Like What Humans Do What Gorilla Trekking Looks Like in Every Month of the Year: Photo Guide What 30 Years of Mountain Gorilla Conservation Looked Like on the Ground Gorilla Trekking for People Who Don’t Like Safaris: Why It Is Different <