A GoPro on a gorilla trek is a genuinely popular idea that collides with a specific and underappreciated physical reality: at the 7-metre minimum distance from gorillas, the wide-angle lens that defines the GoPro’s identity — the approximately 90-120-degree field of view that makes GoPro footage of action sports so compelling — makes a mountain gorilla appear as a small, distant figure occupying perhaps one-tenth of the frame rather than the immersive, close-contact creature the trek delivers in person. The GoPro is excellent for the trek itself — the trail walk, the forest environment, the group dynamics — and limited as a primary gorilla documentation tool. Used as part of a camera system alongside a smartphone or dedicated camera for close-up work, it contributes footage that neither of the others can capture for the Bwindi gorilla trekking experience. See Uganda safari packages.
- Best GoPro use cases: helmet/chest POV of the trek approach through forest; environmental wide shots; self-filming the briefing and trail walk; 360° footage with GoPro MAX
- Worst GoPro use case: primary gorilla documentation at 7+ metres — the gorilla is too small in the frame to be the subject
- Battery life: 1.5-2.5 hours of recording at 4K; carry at least 2 spare batteries for an 8-hour trek day
- Flash: disable all GoPro flash or video light modes before entering the forest; same prohibition applies as all cameras
Taking a GoPro on a gorilla trek is a popular idea — the camera is small, rugged, waterproof, and produces compelling wide-angle footage of outdoor adventures. Gorilla trekking in Bwindi Impenetrable Forest and Mgahinga Gorilla National Park presents specific challenges that expose the GoPro’s limitations in ways that many visitors do not anticipate before their $800-permit experience in 2027. This honest, practical assessment of what a GoPro can and cannot do in the gorilla trekking context helps you decide whether to bring one, how to use it most effectively if you do, and what supplementary camera system to carry alongside it to capture what the GoPro cannot.
What the GoPro does genuinely well on a gorilla trek
The trek itself: immersive first-person footage
The GoPro is genuinely excellent for filming the gorilla trek itself — the multi-hour walk through Bwindi’s dense forest, crossing streams on mossy rocks, pushing through tangles of understorey vegetation, scrambling up steep muddy slopes behind your ranger, and the atmospheric arrival at the gorilla family’s location. A GoPro mounted on a chest harness or head mount captures the immersive, first-person perspective of the trek in a way that no other camera type can replicate. The wide-angle fisheye view of forest canopy above, roots and undergrowth below, fellow trekkers moving ahead, and the ranger cutting a path captures the physical reality of the trekking experience with an authentic immediacy. Viewers who have not done a gorilla trek experience something of its physical character from chest-mount GoPro footage in a way that telephoto wildlife footage alone does not convey.
Weather resistance is a genuine GoPro advantage at Bwindi. The GoPro Hero 13 and Hero 12 are waterproof to 10 metres without a housing — this means light rain, forest mist, and stream crossings present zero risk to the camera. Carrying a $3,000 mirrorless camera with a $2,000 telephoto lens in wet forest conditions requires constant attention to weather protection; the GoPro can simply be worn and forgotten regardless of precipitation. For visitors trekking in the rainy season (March-May, October-November), this weather independence is more than a convenience.
Environmental context during the encounter
For wide-angle shots that show gorillas in their forest environment — a silverback against a background of tropical vegetation, the scale of the forest relative to the animals, the trekking group observing from the regulation distance — a GoPro can produce effective footage when gorillas are close. At 7 metres or less, a GoPro on a chest mount captures the full scene with the immediacy of personal presence that a telephoto camera on a tripod at the same distance cannot replicate. These environmental shots complement the close-up telephoto portraits from your primary camera and create a more complete visual record of the encounter experience.
What the GoPro does not do well: the critical limitations
No telephoto reach
The GoPro’s fixed ultra-wide-angle lens has no optical zoom whatsoever. When gorillas are at 10 metres or more — which happens frequently as the family moves through vegetation, forages across a wide area, or when a nervous individual retreats from the group — the GoPro produces footage where gorillas are small, distant figures in a large frame dominated by forest vegetation. For compelling gorilla portraits that show facial expression, eye contact, and the textural detail of gorilla fur, you need focal length the GoPro fundamentally cannot provide. This is the critical limitation that makes a GoPro alone insufficient for any visitor who wants to photograph gorillas rather than simply document having been present at the same location.
Low-light performance in forest shade
Bwindi’s forest interior is substantially darker than open outdoor environments. GoPro sensors, while improving with each generation, use small image sensors that cannot match the low-light performance of larger-format cameras. In deep forest shade, GoPro footage shows significant luminance noise (grain), colour noise in shadow areas, and a tendency toward underexposure as the automatic exposure system struggles to find adequate light for clean capture. The GoPro Hero 13’s improved Night Effect mode and improved sensor generation help compared to older models, but the fundamental sensor size limitation cannot be overcome through software processing alone. In practice, GoPro footage of the gorilla encounter in darker forest conditions looks significantly worse than footage from the same location on a mirrorless or even a modern smartphone.
The optimal GoPro strategy for gorilla trekking
The most effective GoPro strategy for gorilla trekking in 2027 is to use it as a dedicated supplementary camera alongside a primary camera with telephoto capability — never as the sole camera. Wear the GoPro on a chest harness throughout the entire trek and encounter to capture continuous immersive footage with no effort or attention required. Use a mirrorless camera, DSLR, or high-quality telephoto-capable smartphone as your primary camera for the close gorilla portraits, behavioural captures, and low-light individual shots that require focal length and sensor quality.
The two footage types complement each other perfectly in the edit: GoPro wide-angle footage gives viewers the context, scale, and physical experience of being present; telephoto primary camera footage gives them the intimate detail and emotional connection of gorilla portraiture. A 3-5 minute encounter video that combines chest-mount GoPro context footage with telephoto portrait clips tells a more complete and engaging story than either camera could produce alone.
GoPro settings for the best encounter footage
Specific GoPro settings for the gorilla encounter in 2027: enable HyperSmooth stabilisation at the maximum setting (Boost or Auto Boost) for all video recording — the stabilisation difference between maximum and medium settings is immediately visible in footage from a physically tired trekker. Shoot in 4K at 60fps for the option of 2.4x slow-motion playback in post-editing — gorilla movement at 60fps slowed to 25fps produces beautiful, contemplative footage that emphasises the deliberate, powerful quality of gorilla movement. Set the field of view to Wide rather than Max SuperView for standard encounter footage; the reduced distortion at Wide produces more natural-looking footage. Set exposure compensation to +0.5 to +1.0 stops to compensate for the GoPro’s tendency to underexpose dark gorilla subjects against brighter forest backgrounds.
Use TimeWarp at 15x speed for the long trekking sections at the beginning and end of the day — this compresses hours of walking into a few minutes of engaging footage. Switch to standard video for the final approach to the gorilla family and the entire encounter. Enable Wind Noise Reduction in audio settings for the trekking sections; disable it during the encounter itself where the subtle forest sounds and gorilla vocalisations are worth capturing cleanly. A fully charged GoPro with a 128GB memory card easily covers a full gorilla trekking day including the trek and encounter.
Why does a GoPro produce small-looking gorillas in the footage?
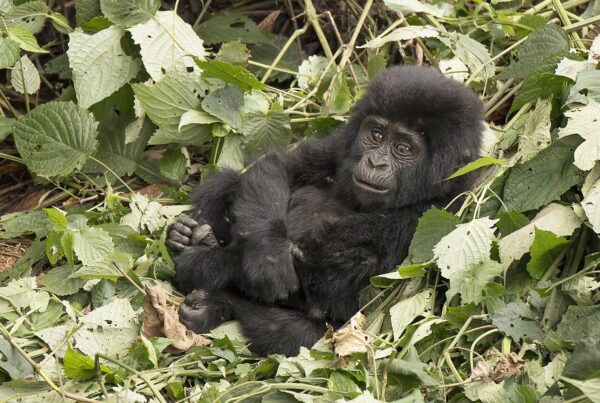
The wide-angle field of view is the GoPro’s defining feature and its specific limitation for close-wildlife documentation. A GoPro HERO 13 at its widest setting uses approximately a 16mm equivalent focal length with a 155-degree field of view. At 7 metres from an adult male gorilla (approximately 1.8m tall), this means the gorilla occupies about 14-15 degrees of the 155-degree frame — roughly 10% of the image height. The gorilla is recognisably a gorilla in this image but is not the immersive, face-filling subject that gorilla photography aspires to. Compare this to a 100mm telephoto lens at 7 metres, which produces a frame where the gorilla fills 50-60% of the image height. The GoPro’s wide-angle view is specifically designed for action sports where the camera is extremely close to the subject (a helmet cam 3 metres from a wave) or where the environment and movement context is the subject (a mountain bike trail). Neither of these applies to gorilla photography. If the gorilla is your primary subject, the GoPro should be your secondary camera, not your primary one.
What is the GoPro genuinely good for during a gorilla safari?
The GoPro’s strengths align well with specific moments of the gorilla trekking experience that a standard camera handles poorly. The approach trek through Bwindi’s forest: a chest-mounted or helmet-mounted GoPro captures the POV experience of pushing through dense vegetation, crossing streams, and ascending steep ridges in a way that a handheld DSLR cannot — you have both hands free and the camera follows your movement naturally. The briefing: a GoPro on a tripod or selfie stick captures the group briefing, the ranger-guide introduction, and the atmosphere of the trailhead before the trek starts — good contextual footage for a trip edit. The forest environment: wide-angle footage of the forest interior, the canopy, the light through trees, and the walking conditions provides environmental context that telephoto gorilla shots lack. Group shots: a GoPro on a selfie stick captures the group celebrating after the encounter in a way no other camera does as naturally. GoPro MAX 360-degree footage: the GoPro MAX in 360 mode captures a complete sphere that can be reframed in post-production — useful for capturing moments where you don’t know exactly where the gorilla will appear.
How do I manage GoPro battery life on an 8-hour gorilla trek day?
Battery management is the single most practical challenge for GoPro users on long gorilla trek days. GoPro HERO 13 battery life at 4K/30fps is approximately 1.5-2.5 hours of continuous recording depending on temperature (cold conditions reduce battery life significantly; Bwindi’s morning mountain temperatures of 14-16°C are cold enough to affect battery performance). For an 8-hour trek day, you need at minimum 3 fully charged batteries. The standard approach: carry 2-3 spare batteries charged the night before at your lodge; do not count on charging in the forest; if your lodge provides a packed lunch delivered to the forest (some do), you could exchange batteries at a lunch stop. Power management during the trek: turn the GoPro off between notable moments rather than running it continuously — there is a lot of forest walking that is not worth recording. The QuikCapture feature (one button turns on and starts recording immediately) makes this practical: the camera wakes and records within 1-2 seconds, so you do not miss moments by turning the camera off between sections.
Can I use a GoPro on a chest mount or head mount during the encounter?
Yes — chest and head mounts are permitted during gorilla encounters provided they do not violate the core encounter rules (no flash, maintain minimum distance, no rapid or alarming movements). Chest mounts produce a POV perspective that captures the encounter from roughly your eye level and includes your hands and camera in the frame — good for communicating what the experience feels like from inside the group. Head mounts capture a higher perspective with more head movement that some viewers find difficult to watch. Key consideration: during the encounter, both the chest and head mounts continue recording passively while your hands are free for other cameras — this is the GoPro’s ideal role during the encounter itself. Let the GoPro run hands-free for environmental context while you use your phone or mirrorless camera for the deliberate gorilla portraits. The resulting footage combination — GoPro environment plus DSLR/phone gorilla closeups — produces a more complete record than either camera alone. Mount the GoPro before the briefing and run it throughout the pre-trek walk to capture the forest approach context.
What is the GoPro MAX and is it worth bringing for gorilla trekking?
The GoPro MAX is GoPro’s 360-degree camera — it captures a full sphere with two wide-angle lenses, and the resulting footage can be reframed in post-production in any direction, allowing you to decide after the fact where to point the “camera”. For gorilla trekking specifically, the MAX offers a genuinely useful capability: during the encounter, gorillas move unpredictably and in any direction relative to your position. A 360-degree recording captures everything around you simultaneously; in post, you can reframe to follow the silverback’s bluff charge, the mother carrying her infant, or the juvenile playing — whichever moment was most significant — regardless of which direction the camera physically faced. The limitation: 360 footage in a forest with direct and dappled light creates challenging stitching and exposure conditions; the MAX’s image quality in single-lens “HERO mode” is lower than HERO 13. The MAX is a valuable addition if you own one already; it is not worth buying specifically for gorilla trekking if you do not already use 360 footage in your workflow.
- Insect Repellent for Gorilla Trekking: What Actually Works in Uganda
- Mobile Phone Signal in Bwindi: What Networks Work
- Malaria Prevention for Uganda: What Works and What to Pack
- Insect Repellent for Gorilla Trekking: What Actually Works
- Mobile Phone Signal in Bwindi: What Networks Work
- Uganda Visa on Arrival 2026: Who Qualifies, How It Works, and What You Need
- Your Gorilla Trekking Itinerary Built in 48 Hours: How It Works
- Nairobi to Bwindi Gorilla Trekking: The 4-Day Trip That Works
- Your Gorilla Trekking Uganda Itinerary: A Day-by-Day Plan That Works
- Gorilla Trekking Uganda Refer a Friend: How Our Referral Reward Works