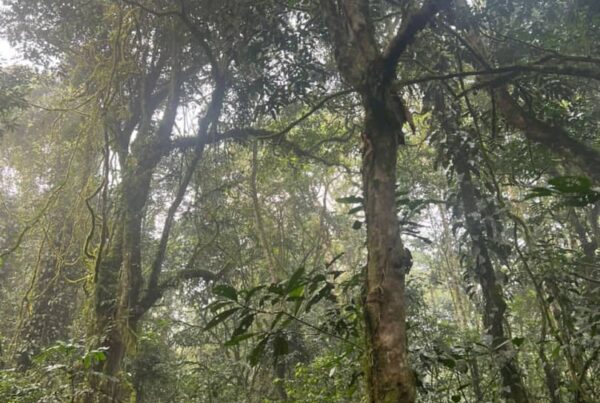
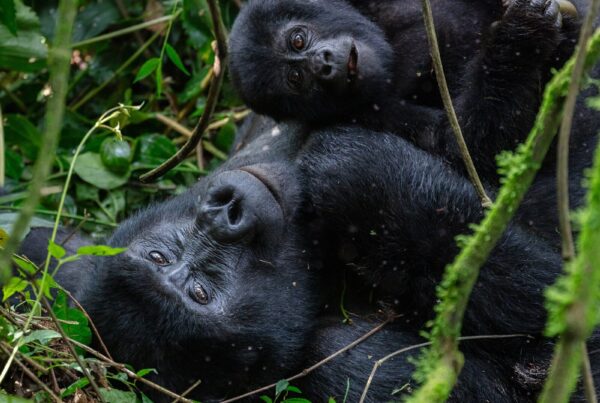
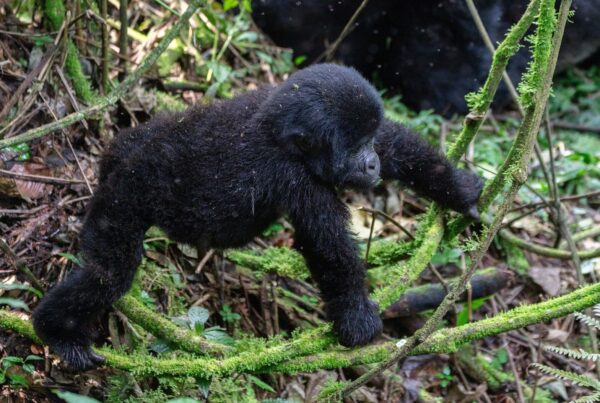
The specific combination of challenges that Bwindi’s forest presents to photographers — dense overhead canopy that reduces ambient light to levels requiring ISO 1600–6400 even in morning hours, wild animals that move without announcement and whose behaviour cannot be controlled or anticipated, a 60-minute encounter window with no replay, flash photography prohibited to protect the gorillas, and a 7-metre minimum approach distance that makes long focal lengths necessary for intimate portraits — means that a photographer who arrives with the wrong camera settings, the wrong lens choice, or the wrong preparatory mental framework will come home with technically mediocre images of one of the most photographically compelling wildlife subjects on earth, and that a photographer who prepares specifically for Bwindi’s conditions will come home with extraordinary ones. This guide is written for the full spectrum of gorilla photographers — from full-frame mirrorless with f/2.8 70–200mm to a recent-generation smartphone — and the core principles of light management, behaviour anticipation, and composition apply across that spectrum. For permit booking, see the permit guide; for which families offer the most photogenic encounters (open forest clearings vs dense canopy), see the gorilla families guide.
Gorilla Photography: Key Technical Facts
- No flash allowed: ever — not even in dense shade; this is a conservation rule, not a preference
- Minimum distance: 7 metres — long telephoto (70–200mm on full frame) needed for close-framing portraits
- Light conditions: dim forest understorey — plan for ISO 1600–6400, wide aperture (f/2.8 or wider)
- Shutter speed: minimum 1/200s for moving subjects, 1/500s to freeze fast movement
- Best subject moments: gorillas feeding, juveniles playing, silverback chest-beating (rare, unpredictable)
- Encounter time is 60 minutes — pre-set your camera before entering the gorilla clearing, not after
Every gorilla trekker carries a camera, but the difference between snapshots and extraordinary wildlife photographs lies in preparation, technique, and an understanding of the unique challenges that Bwindi’s forest presents. The dim light under dense canopy, the unpredictable movement of wild animals, the one-hour time limit, and the prohibition on flash photography create conditions that demand specific skills and equipment choices. Professional wildlife photographers who have spent years refining their craft in African forests have developed approaches that maximise the quality of images captured during this brief but extraordinary encounter.
This guide distills the collective wisdom of experienced gorilla photographers into actionable advice that any trekker can apply. It covers equipment selection, camera settings for forest conditions, composition principles, behavioural anticipation, post-processing techniques, and the ethical boundaries that separate responsible wildlife photography from intrusive pursuit of the perfect shot. Whether you shoot with a professional DSLR, a mirrorless system, or a smartphone, these principles will help you return from Bwindi with images that do justice to the encounter.
Equipment Selection for Forest Photography
The forest environment imposes genuine constraints on equipment choice. Low light under the canopy demands lenses with wide maximum apertures and cameras with strong high-ISO performance. The prohibition on flash means you cannot supplement available light artificially. The need for quiet movement discourages equipment that makes noise or requires extensive setup.
For DSLR and mirrorless shooters, a full-frame camera offers significant advantages in low light, producing cleaner images at high ISO settings than crop-sensor alternatives. The difference between ISO 3200 on a full-frame body and the same setting on a smaller sensor can be the difference between a usable image and a grainy mess. If you own or can rent a full-frame body for your trek, the investment is worthwhile.
Lens choice is equally critical. A seventy to two hundred millimetre f/2.8 zoom is the workhorse lens for most gorilla photographers, offering versatility for both group shots and facial close-ups while maintaining a wide enough aperture for the dim conditions. Prime lenses in the eighty-five to one hundred thirty-five millimetre range offer even wider apertures and superior sharpness but sacrifice framing flexibility. For environmental shots that include habitat context, a twenty-four to seventy millimetre lens is useful, though the wider focal lengths see limited use during the actual gorilla encounter.
Smartphone photography has advanced remarkably, and modern flagship phones can produce genuinely impressive gorilla images in the right conditions. The key limitations are digital rather than optical zoom, which degrades image quality, and smaller sensors that struggle more in low light. Use the phone’s native focal length rather than digital zoom, get as close as composition allows within the seven-metre rule, and stabilise the phone against your body or a tree to reduce motion blur.
Camera Settings for Forest Conditions
Bwindi’s forest canopy reduces light levels dramatically, even at midday. Photographers accustomed to shooting in open savannah or urban environments will find that their normal settings produce underexposed images. Adapting to these conditions requires adjusting multiple parameters simultaneously.
Aperture should generally be set to the widest available setting, f/2.8 or wider if your lens allows. This maximises light gathering and creates pleasant background blur that isolates the gorilla from cluttered vegetation. However, be aware that very wide apertures reduce depth of field, meaning that precise focus on the eyes becomes critical. If the eyes are sharp but the nose is slightly soft, the image may still work. If the eyes are soft, the image generally fails.
Shutter speed must be fast enough to eliminate camera shake and subject motion. A useful rule of thumb is to use a shutter speed at least equal to the reciprocal of your focal length: at two hundred millimetres, use one two-hundredth of a second or faster. For active juveniles or moving adults, even faster speeds may be necessary. Image stabilisation, whether in-lens or in-body, provides one to three stops of compensation, allowing slower shutter speeds when subjects are stationary.
ISO should be set to auto with an upper limit of 6400 or 12800 depending on your camera’s capabilities. Modern full-frame cameras produce acceptable images at ISO 6400, while smaller sensors may struggle beyond 3200. Do not be afraid of high ISO values; a slightly noisy sharp image is always preferable to a clean blurry one. Noise reduction in post-processing can address grain, but nothing can recover motion blur from too slow a shutter speed.
Focus mode should be set to continuous autofocus with tracking if your camera supports it. Gorillas move, even when apparently resting, and single-shot focus will produce missed shots. Face detection or eye detection autofocus is invaluable if available, as it ensures that the most critical element of the image remains sharp even when composition changes.
Composition Principles for Gorilla Photography
Technical competence with camera settings is necessary but not sufficient for compelling gorilla photographs. Composition, the arrangement of elements within the frame, determines whether an image merely documents an encounter or conveys its emotional power.
The rule of thirds provides a starting point for placing the gorilla within the frame. Position the eyes at one of the intersection points rather than dead centre. This creates visual tension and interest that centred compositions lack. However, rules are made to be broken, and certain situations call for central placement, particularly when the gorilla is looking directly at the camera with an intense gaze.
Leave space in the direction the gorilla is looking or moving. If the gorilla is gazing to the right, place it on the left side of the frame with space to the right. This gives the subject room to exist within the image and creates a sense of narrative possibility. Conversely, if the gorilla is looking directly at the camera, a tighter crop that fills the frame with face can be powerfully intimate.
Include environmental context when it adds meaning. A silverback framed against ancient forest, with moss-covered trees and filtered light, conveys something about habitat and ecology that a tight facial portrait cannot. Similarly, including other family members in the background adds depth to social portraits. However, avoid cluttered backgrounds that distract from the subject. The dense vegetation of Bwindi can create messy compositions if not managed carefully.
Anticipating Behaviour and Timing
The one-hour time limit means that photographers cannot wait indefinitely for perfect moments. Anticipating behaviour and being ready to capture decisive moments separates good gorilla photographers from great ones. Understanding gorilla behaviour helps predict when interesting actions will occur.
Juveniles are the most photographically active subjects, playing, tumbling, and interacting with siblings. Watch for moments of play between juveniles, which produce dynamic, emotionally engaging images. Mothers with infants offer tender moments of grooming, nursing, and protection. Silverbacks, while less active, provide the most imposing portraits when they make eye contact or display subtle expressions of authority.
Gorillas yawn frequently, revealing impressive canine teeth in images that convey their wild nature. They also scratch, stretch, and reposition themselves in ways that reveal musculature and movement. These apparently mundane behaviours often produce more authentic and compelling photographs than posed stillness.
The best photographers shoot continuously during peak moments rather than trying to time single shots. Burst mode, shooting at five to ten frames per second, captures sequences of behaviour that single shots miss. The memory cost is trivial compared to the value of capturing a perfect expression or interaction.
Ethical Boundaries in Wildlife Photography
The pursuit of the perfect photograph must never override respect for the gorillas or compliance with park rules. Flash photography is absolutely prohibited and for good reason; it disturbs gorillas and can trigger defensive behaviour. Disabling flash before the trek begins is essential.
Moving closer than seven metres for better composition violates the rule and risks disease transmission. Using a longer lens or cropping in post-processing achieves similar results without endangering the animals. Pushing past other trekkers for position, making noise to attract attention, or extending the hour by ignoring guide instructions are all unacceptable behaviours that prioritise photography over conservation.
Respect the encounter as an experience first and a photographic opportunity second. Some of the most meaningful moments, a juvenile’s curious approach, a mother’s gentle touch, a silverback’s direct gaze, cannot be fully captured by any camera. Be present for these moments rather than viewing them exclusively through a viewfinder. The photographs you take are souvenirs of the experience, not substitutes for it.
Post-Processing for Forest Images
Even well-exposed forest photographs benefit from thoughtful post-processing. The dim, green-dominated light of Bwindi can produce images that appear flat or colour-cast without adjustment.
White balance correction is often necessary. Forest shade has a strong green colour cast that can make gorilla fur appear unnaturally tinted. Adjusting white balance toward warmer tones produces more natural colours. If you shoot in RAW format, which is strongly recommended, white balance can be adjusted after capture without quality loss.
Exposure and contrast adjustments help compensate for the flat lighting. Lifting shadows slightly reveals detail in dark fur without blowing highlights. Adding modest contrast restores the dimensionality that flat forest light diminishes. Be cautious with saturation; forest greens can easily become garish with heavy-handed adjustment.
Noise reduction addresses the grain that high-ISO shooting inevitably produces. Most editing software includes noise reduction tools that balance grain removal with detail preservation. Apply noise reduction selectively to shadow areas where grain is most visible, preserving detail in brighter regions.
Final Thoughts
Gorilla photography is among the most rewarding and challenging forms of wildlife photography. The conditions are demanding, the time is limited, and the subjects are utterly unlike anything else on Earth. But these very challenges make successful images precious. A well-composed, technically sound photograph of a mountain gorilla is not merely a picture. It is evidence of an encounter that few humans will ever experience, a bridge between your world and the ancient forest world that gorillas inhabit.
When you review your images after returning home, you will find that the best ones are not necessarily the most technically perfect. They are the ones that capture something true: an expression, an interaction, a moment of connection across the species boundary. Your camera is a tool, but your attention, your respect, and your willingness to be present are what create photographs worth keeping. Master the technical skills, apply the compositional principles, and then let go enough to simply witness. The images that emerge from that balance between craft and presence are the ones that will endure.
Frequently Asked Questions
The optimal starting camera settings for Bwindi gorilla photography depend on your camera body and lens combination, but a practical baseline for the forest understorey is: aperture priority mode with widest available aperture (f/2.8 on a zoom, f/1.8–2.8 on a prime), Auto ISO with a ceiling of ISO 6400 for modern full-frame or Sony/Nikon mirrorless sensors (ISO 3200 ceiling for older or smaller sensor cameras), and minimum shutter speed set to 1/250s to freeze light gorilla movement. In clearings or breaks in the canopy where direct or dappled light reaches the forest floor, your camera will automatically step down ISO — the settings compensate both for full shade and for shaft-of-light moments automatically. Shoot in RAW format rather than JPEG — the additional tonal latitude in RAW files means that images that appear slightly underexposed in the field can recover shadow detail in post-processing that JPEG compression would discard. Set your autofocus to eye detection or continuous face/subject tracking before entering the gorilla clearing. What is the best lens for gorilla photography in Bwindi? The 70–200mm f/2.8 telephoto zoom is the most versatile single lens for gorilla photography: it covers the focal range from environmental group shots (70mm end) to tight facial portraits (200mm end) while maintaining the wide aperture needed for forest light. A 100–400mm zoom sacrifices the f/2.8 aperture for greater reach — useful in clearings with sufficient light but limiting in deep shade. A 50mm or 85mm f/1.8 prime is an alternative for photographers prioritising low light over reach, producing technically cleaner images in poor light but sacrificing the ability to frame tight portraits from 7 metres distance. For smartphones and smaller camera systems, the camera’s optical telephoto module (2x or 3x) paired with portrait mode is the practical approach — the computational photography in current flagship smartphones handles high-ISO noise reduction effectively and produces competent results under the conditions that would have been technically challenging for smartphones just 2–3 generations ago. What are the most important photography moments to anticipate during the 60-minute encounter? The 60-minute encounter contains several distinct photographic opportunities that are worth anticipating specifically. The first 5 minutes are often the highest-energy: the group’s arrival at the gorillas’ position produces the most alert and reactive gorilla behaviour — silverbacks sitting upright, mothers gathering infants, juveniles pausing activity to observe the visitors. This is when direct eye contact and expressive faces are most common; be ready to shoot immediately on first contact. Juvenile play sequences are typically the most reliably sustained photographic moments in the mid-encounter period — young gorillas play independently of the group’s reaction to visitors and provide natural action sequences for 10–20 continuous minutes. Feeding sequences are the most photogenic for detail shots: the deliberate, methodical way gorillas process vegetation produces close hand and mouth shots with strong texture and detail. The silverback’s dominant posture — typically at the group’s edge, occasionally standing briefly — is the encounter’s signature image; he usually repositions 2–3 times during the hour, and each repositioning produces a brief active shot opportunity. Should I hire a gorilla photography specialist guide for better shots? Photography-specialist guides — operators who pair serious photographers with rangers who have extensive knowledge of individual gorilla behaviour and who actively anticipate shot opportunities during the encounter — are available through several Uganda safari operators. The value of a photography specialist over a standard ranger varies depending on your own experience level: an experienced wildlife photographer with good self-directed anticipation skills will gain less marginal benefit from specialist guidance than a photographer who is new to wildlife subjects and benefits from someone identifying and flagging moments in real time. What specialist guide operators do consistently well is positioning — knowing where to stand relative to the gorilla family’s movement patterns to maximise light, background, and framing opportunity within the 7-metre constraint. For photographers doing multiple treks on the same trip (the GHE 4-hour experience, or two standard treks on consecutive days), specialist guidance on the first trek dramatically improves the second trek’s output. Is it possible to get good gorilla photos with a smartphone? Current-generation flagship smartphones (iPhone 15 Pro/16 Pro, Samsung Galaxy S24 Ultra, Google Pixel 9 Pro) produce gorilla photographs that are genuinely strong — not as technically refined as a full-frame mirrorless with a fast 200mm lens, but commercially usable and emotionally compelling. The key limitations are: optical zoom reach (5x maximum on most current flagships versus 200mm equivalent on a DSLR zoom from 7 metres), and performance in the lowest-light forest shade where even computational photography reaches its limits at high equivalent ISO. The practical smartphone approach is to use the 5x telephoto optical lens for portrait framing, use portrait mode for background separation, avoid digital zoom above the optical maximum (image quality degrades sharply), and accept that the densest shade conditions will produce noisier results than a faster lens on a larger sensor. In good light — a clearing, dappled canopy break, or open hillside — smartphone results are excellent. In deep forest shade, a camera with a fast prime lens and a full-frame sensor will clearly outperform a smartphone. Photograph the gorillas with preparation Uganda Gorilla Families — which families range in open versus dense forest terrain (affects light quality) Gorilla Permit Guide — book the permit; confirm family and sector for photography planning Bwindi Sector Guide — sector terrain characteristics that affect photography conditions Rwanda Gorilla Families — Virunga’s more open volcanic terrain sometimes gives better photography light Safari Itineraries — photography-focused multi-day itineraries including multiple trek days Further Reading Gorilla Trekking Uganda for Wildlife Photographers: Professional Rates and Preparation Uganda vs Kenya Safari: Which Country Is Better for Wildlife in 2026? Gorilla Trekking vs the Serengeti: Which Is the Better Wildlife Experience? Post-processing gorilla photos: editing techniques for forest wildlife images Why Gorilla Trekking in Uganda Is Africa’s Most Unforgettable Wildlife Adventure What a 3-Day Uganda Wildlife and Cycling Safari Did to My Family Was Beyond Anything We Expected Wildlife in Uganda – Where Nature Still Roars, Hums, and Soars Free Why a 2-Day Uganda Wildlife and Cycling Safari Is the Perfect Business Break Why Would My Soul Long for a 9-Day Uganda Gorilla Trekking and Wildlife Safari? Murchison Falls Uganda Wildlife Safari — 4-Days: Where the Nile Breaks and the Wild Roars <
The 70–200mm f/2.8 telephoto zoom is the most versatile single lens for gorilla photography: it covers the focal range from environmental group shots (70mm end) to tight facial portraits (200mm end) while maintaining the wide aperture needed for forest light. A 100–400mm zoom sacrifices the f/2.8 aperture for greater reach — useful in clearings with sufficient light but limiting in deep shade. A 50mm or 85mm f/1.8 prime is an alternative for photographers prioritising low light over reach, producing technically cleaner images in poor light but sacrificing the ability to frame tight portraits from 7 metres distance. For smartphones and smaller camera systems, the camera’s optical telephoto module (2x or 3x) paired with portrait mode is the practical approach — the computational photography in current flagship smartphones handles high-ISO noise reduction effectively and produces competent results under the conditions that would have been technically challenging for smartphones just 2–3 generations ago. What are the most important photography moments to anticipate during the 60-minute encounter? The 60-minute encounter contains several distinct photographic opportunities that are worth anticipating specifically. The first 5 minutes are often the highest-energy: the group’s arrival at the gorillas’ position produces the most alert and reactive gorilla behaviour — silverbacks sitting upright, mothers gathering infants, juveniles pausing activity to observe the visitors. This is when direct eye contact and expressive faces are most common; be ready to shoot immediately on first contact. Juvenile play sequences are typically the most reliably sustained photographic moments in the mid-encounter period — young gorillas play independently of the group’s reaction to visitors and provide natural action sequences for 10–20 continuous minutes. Feeding sequences are the most photogenic for detail shots: the deliberate, methodical way gorillas process vegetation produces close hand and mouth shots with strong texture and detail. The silverback’s dominant posture — typically at the group’s edge, occasionally standing briefly — is the encounter’s signature image; he usually repositions 2–3 times during the hour, and each repositioning produces a brief active shot opportunity. Should I hire a gorilla photography specialist guide for better shots? Photography-specialist guides — operators who pair serious photographers with rangers who have extensive knowledge of individual gorilla behaviour and who actively anticipate shot opportunities during the encounter — are available through several Uganda safari operators. The value of a photography specialist over a standard ranger varies depending on your own experience level: an experienced wildlife photographer with good self-directed anticipation skills will gain less marginal benefit from specialist guidance than a photographer who is new to wildlife subjects and benefits from someone identifying and flagging moments in real time. What specialist guide operators do consistently well is positioning — knowing where to stand relative to the gorilla family’s movement patterns to maximise light, background, and framing opportunity within the 7-metre constraint. For photographers doing multiple treks on the same trip (the GHE 4-hour experience, or two standard treks on consecutive days), specialist guidance on the first trek dramatically improves the second trek’s output. Is it possible to get good gorilla photos with a smartphone? Current-generation flagship smartphones (iPhone 15 Pro/16 Pro, Samsung Galaxy S24 Ultra, Google Pixel 9 Pro) produce gorilla photographs that are genuinely strong — not as technically refined as a full-frame mirrorless with a fast 200mm lens, but commercially usable and emotionally compelling. The key limitations are: optical zoom reach (5x maximum on most current flagships versus 200mm equivalent on a DSLR zoom from 7 metres), and performance in the lowest-light forest shade where even computational photography reaches its limits at high equivalent ISO. The practical smartphone approach is to use the 5x telephoto optical lens for portrait framing, use portrait mode for background separation, avoid digital zoom above the optical maximum (image quality degrades sharply), and accept that the densest shade conditions will produce noisier results than a faster lens on a larger sensor. In good light — a clearing, dappled canopy break, or open hillside — smartphone results are excellent. In deep forest shade, a camera with a fast prime lens and a full-frame sensor will clearly outperform a smartphone. Photograph the gorillas with preparation Uganda Gorilla Families — which families range in open versus dense forest terrain (affects light quality) Gorilla Permit Guide — book the permit; confirm family and sector for photography planning Bwindi Sector Guide — sector terrain characteristics that affect photography conditions Rwanda Gorilla Families — Virunga’s more open volcanic terrain sometimes gives better photography light Safari Itineraries — photography-focused multi-day itineraries including multiple trek days Further Reading Gorilla Trekking Uganda for Wildlife Photographers: Professional Rates and Preparation Uganda vs Kenya Safari: Which Country Is Better for Wildlife in 2026? Gorilla Trekking vs the Serengeti: Which Is the Better Wildlife Experience? Post-processing gorilla photos: editing techniques for forest wildlife images Why Gorilla Trekking in Uganda Is Africa’s Most Unforgettable Wildlife Adventure What a 3-Day Uganda Wildlife and Cycling Safari Did to My Family Was Beyond Anything We Expected Wildlife in Uganda – Where Nature Still Roars, Hums, and Soars Free Why a 2-Day Uganda Wildlife and Cycling Safari Is the Perfect Business Break Why Would My Soul Long for a 9-Day Uganda Gorilla Trekking and Wildlife Safari? Murchison Falls Uganda Wildlife Safari — 4-Days: Where the Nile Breaks and the Wild Roars <
The 60-minute encounter contains several distinct photographic opportunities that are worth anticipating specifically. The first 5 minutes are often the highest-energy: the group’s arrival at the gorillas’ position produces the most alert and reactive gorilla behaviour — silverbacks sitting upright, mothers gathering infants, juveniles pausing activity to observe the visitors. This is when direct eye contact and expressive faces are most common; be ready to shoot immediately on first contact. Juvenile play sequences are typically the most reliably sustained photographic moments in the mid-encounter period — young gorillas play independently of the group’s reaction to visitors and provide natural action sequences for 10–20 continuous minutes. Feeding sequences are the most photogenic for detail shots: the deliberate, methodical way gorillas process vegetation produces close hand and mouth shots with strong texture and detail. The silverback’s dominant posture — typically at the group’s edge, occasionally standing briefly — is the encounter’s signature image; he usually repositions 2–3 times during the hour, and each repositioning produces a brief active shot opportunity. Should I hire a gorilla photography specialist guide for better shots? Photography-specialist guides — operators who pair serious photographers with rangers who have extensive knowledge of individual gorilla behaviour and who actively anticipate shot opportunities during the encounter — are available through several Uganda safari operators. The value of a photography specialist over a standard ranger varies depending on your own experience level: an experienced wildlife photographer with good self-directed anticipation skills will gain less marginal benefit from specialist guidance than a photographer who is new to wildlife subjects and benefits from someone identifying and flagging moments in real time. What specialist guide operators do consistently well is positioning — knowing where to stand relative to the gorilla family’s movement patterns to maximise light, background, and framing opportunity within the 7-metre constraint. For photographers doing multiple treks on the same trip (the GHE 4-hour experience, or two standard treks on consecutive days), specialist guidance on the first trek dramatically improves the second trek’s output. Is it possible to get good gorilla photos with a smartphone? Current-generation flagship smartphones (iPhone 15 Pro/16 Pro, Samsung Galaxy S24 Ultra, Google Pixel 9 Pro) produce gorilla photographs that are genuinely strong — not as technically refined as a full-frame mirrorless with a fast 200mm lens, but commercially usable and emotionally compelling. The key limitations are: optical zoom reach (5x maximum on most current flagships versus 200mm equivalent on a DSLR zoom from 7 metres), and performance in the lowest-light forest shade where even computational photography reaches its limits at high equivalent ISO. The practical smartphone approach is to use the 5x telephoto optical lens for portrait framing, use portrait mode for background separation, avoid digital zoom above the optical maximum (image quality degrades sharply), and accept that the densest shade conditions will produce noisier results than a faster lens on a larger sensor. In good light — a clearing, dappled canopy break, or open hillside — smartphone results are excellent. In deep forest shade, a camera with a fast prime lens and a full-frame sensor will clearly outperform a smartphone. Photograph the gorillas with preparation Uganda Gorilla Families — which families range in open versus dense forest terrain (affects light quality) Gorilla Permit Guide — book the permit; confirm family and sector for photography planning Bwindi Sector Guide — sector terrain characteristics that affect photography conditions Rwanda Gorilla Families — Virunga’s more open volcanic terrain sometimes gives better photography light Safari Itineraries — photography-focused multi-day itineraries including multiple trek days Further Reading Gorilla Trekking Uganda for Wildlife Photographers: Professional Rates and Preparation Uganda vs Kenya Safari: Which Country Is Better for Wildlife in 2026? Gorilla Trekking vs the Serengeti: Which Is the Better Wildlife Experience? Post-processing gorilla photos: editing techniques for forest wildlife images Why Gorilla Trekking in Uganda Is Africa’s Most Unforgettable Wildlife Adventure What a 3-Day Uganda Wildlife and Cycling Safari Did to My Family Was Beyond Anything We Expected Wildlife in Uganda – Where Nature Still Roars, Hums, and Soars Free Why a 2-Day Uganda Wildlife and Cycling Safari Is the Perfect Business Break Why Would My Soul Long for a 9-Day Uganda Gorilla Trekking and Wildlife Safari? Murchison Falls Uganda Wildlife Safari — 4-Days: Where the Nile Breaks and the Wild Roars <
Photography-specialist guides — operators who pair serious photographers with rangers who have extensive knowledge of individual gorilla behaviour and who actively anticipate shot opportunities during the encounter — are available through several Uganda safari operators. The value of a photography specialist over a standard ranger varies depending on your own experience level: an experienced wildlife photographer with good self-directed anticipation skills will gain less marginal benefit from specialist guidance than a photographer who is new to wildlife subjects and benefits from someone identifying and flagging moments in real time. What specialist guide operators do consistently well is positioning — knowing where to stand relative to the gorilla family’s movement patterns to maximise light, background, and framing opportunity within the 7-metre constraint. For photographers doing multiple treks on the same trip (the GHE 4-hour experience, or two standard treks on consecutive days), specialist guidance on the first trek dramatically improves the second trek’s output. Is it possible to get good gorilla photos with a smartphone? Current-generation flagship smartphones (iPhone 15 Pro/16 Pro, Samsung Galaxy S24 Ultra, Google Pixel 9 Pro) produce gorilla photographs that are genuinely strong — not as technically refined as a full-frame mirrorless with a fast 200mm lens, but commercially usable and emotionally compelling. The key limitations are: optical zoom reach (5x maximum on most current flagships versus 200mm equivalent on a DSLR zoom from 7 metres), and performance in the lowest-light forest shade where even computational photography reaches its limits at high equivalent ISO. The practical smartphone approach is to use the 5x telephoto optical lens for portrait framing, use portrait mode for background separation, avoid digital zoom above the optical maximum (image quality degrades sharply), and accept that the densest shade conditions will produce noisier results than a faster lens on a larger sensor. In good light — a clearing, dappled canopy break, or open hillside — smartphone results are excellent. In deep forest shade, a camera with a fast prime lens and a full-frame sensor will clearly outperform a smartphone. Photograph the gorillas with preparation Uganda Gorilla Families — which families range in open versus dense forest terrain (affects light quality) Gorilla Permit Guide — book the permit; confirm family and sector for photography planning Bwindi Sector Guide — sector terrain characteristics that affect photography conditions Rwanda Gorilla Families — Virunga’s more open volcanic terrain sometimes gives better photography light Safari Itineraries — photography-focused multi-day itineraries including multiple trek days Further Reading Gorilla Trekking Uganda for Wildlife Photographers: Professional Rates and Preparation Uganda vs Kenya Safari: Which Country Is Better for Wildlife in 2026? Gorilla Trekking vs the Serengeti: Which Is the Better Wildlife Experience? Post-processing gorilla photos: editing techniques for forest wildlife images Why Gorilla Trekking in Uganda Is Africa’s Most Unforgettable Wildlife Adventure What a 3-Day Uganda Wildlife and Cycling Safari Did to My Family Was Beyond Anything We Expected Wildlife in Uganda – Where Nature Still Roars, Hums, and Soars Free Why a 2-Day Uganda Wildlife and Cycling Safari Is the Perfect Business Break Why Would My Soul Long for a 9-Day Uganda Gorilla Trekking and Wildlife Safari? Murchison Falls Uganda Wildlife Safari — 4-Days: Where the Nile Breaks and the Wild Roars <
Current-generation flagship smartphones (iPhone 15 Pro/16 Pro, Samsung Galaxy S24 Ultra, Google Pixel 9 Pro) produce gorilla photographs that are genuinely strong — not as technically refined as a full-frame mirrorless with a fast 200mm lens, but commercially usable and emotionally compelling. The key limitations are: optical zoom reach (5x maximum on most current flagships versus 200mm equivalent on a DSLR zoom from 7 metres), and performance in the lowest-light forest shade where even computational photography reaches its limits at high equivalent ISO. The practical smartphone approach is to use the 5x telephoto optical lens for portrait framing, use portrait mode for background separation, avoid digital zoom above the optical maximum (image quality degrades sharply), and accept that the densest shade conditions will produce noisier results than a faster lens on a larger sensor. In good light — a clearing, dappled canopy break, or open hillside — smartphone results are excellent. In deep forest shade, a camera with a fast prime lens and a full-frame sensor will clearly outperform a smartphone. Photograph the gorillas with preparation Uganda Gorilla Families — which families range in open versus dense forest terrain (affects light quality) Gorilla Permit Guide — book the permit; confirm family and sector for photography planning Bwindi Sector Guide — sector terrain characteristics that affect photography conditions Rwanda Gorilla Families — Virunga’s more open volcanic terrain sometimes gives better photography light Safari Itineraries — photography-focused multi-day itineraries including multiple trek days Further Reading Gorilla Trekking Uganda for Wildlife Photographers: Professional Rates and Preparation Uganda vs Kenya Safari: Which Country Is Better for Wildlife in 2026? Gorilla Trekking vs the Serengeti: Which Is the Better Wildlife Experience? Post-processing gorilla photos: editing techniques for forest wildlife images Why Gorilla Trekking in Uganda Is Africa’s Most Unforgettable Wildlife Adventure What a 3-Day Uganda Wildlife and Cycling Safari Did to My Family Was Beyond Anything We Expected Wildlife in Uganda – Where Nature Still Roars, Hums, and Soars Free Why a 2-Day Uganda Wildlife and Cycling Safari Is the Perfect Business Break Why Would My Soul Long for a 9-Day Uganda Gorilla Trekking and Wildlife Safari? Murchison Falls Uganda Wildlife Safari — 4-Days: Where the Nile Breaks and the Wild Roars <